AB Split Testing
Ever noticed that some email campaigns perform better than others?
Different subject lines and email content can hugely affect whether a subscriber opens your email. takes time reading it, and ultimately interacts with it.
AB Split testing enables you to send multiple versions of a campaign to a portion of your subscribers, checks which version performs the best and then sends the winner to the rest of your subscribers.
It's a great way to fine-tune your email marketing and figure out what works, and what doesn't.
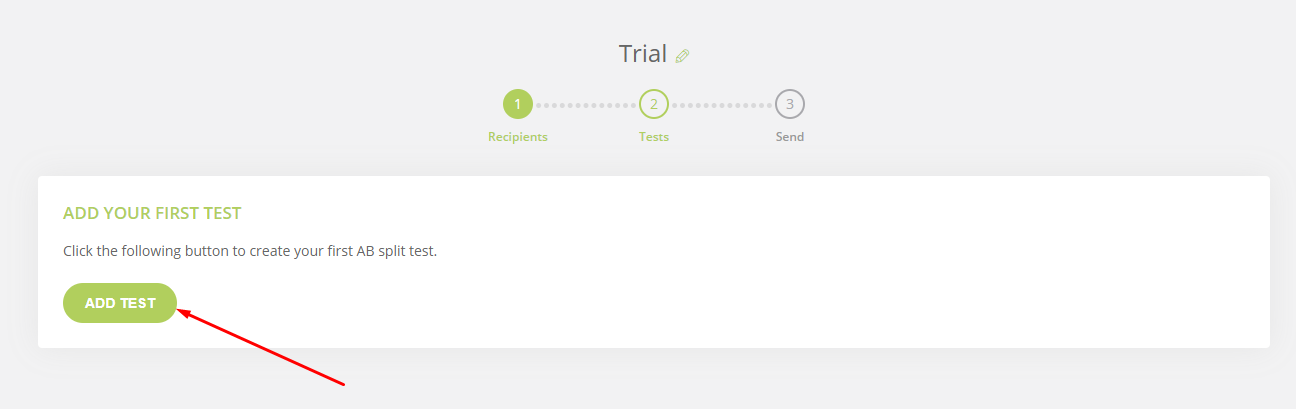
Create your first AB Split Test
AB Split Testing sounds complicated, and you would be forgiven for thinking it might be hard to set up a test, but it's actually really straightforward.
Here's how to create your first AB split test in just a few steps...
Step 1: Before you begin, you must make sure you are logged in to the MAILVIO control panel.
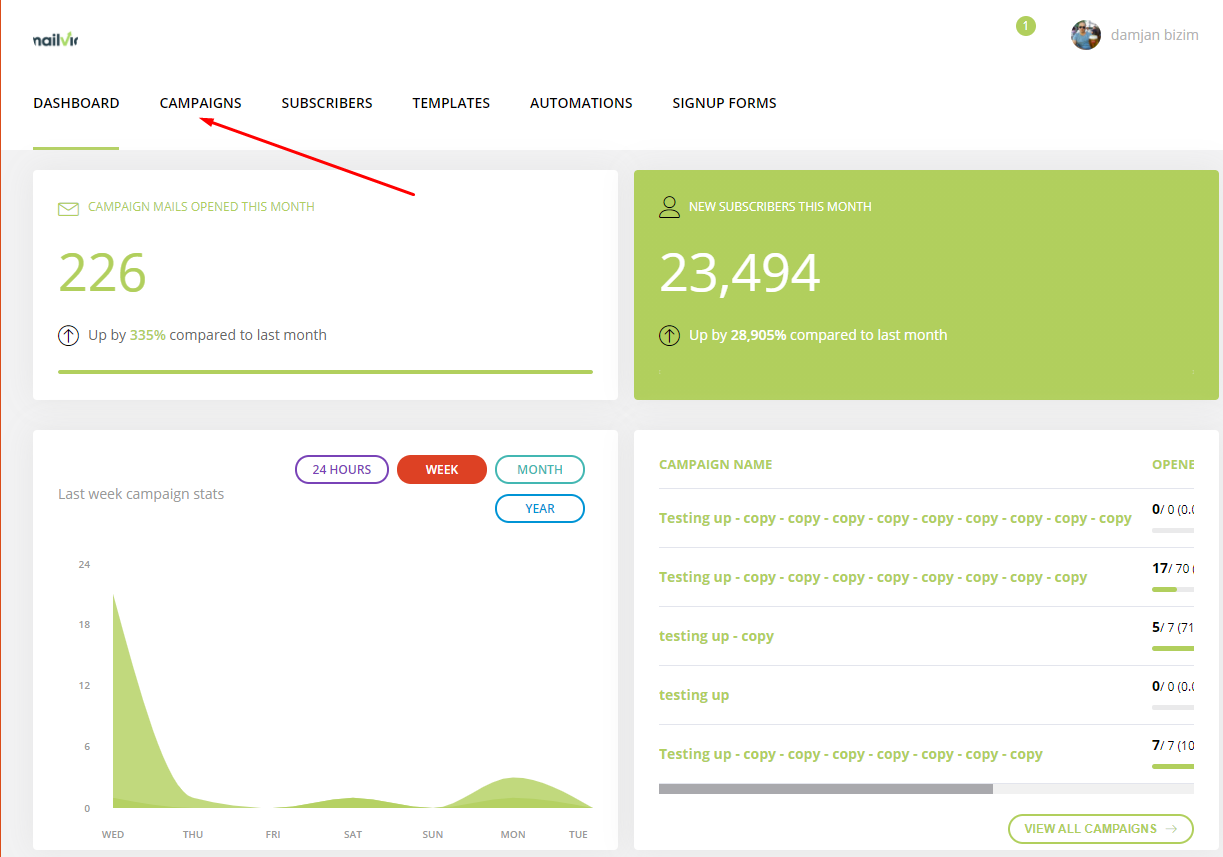
Step 2: Once logged in to the MAILVIO control panel, click the "START NEW CAMPAIGN " button at the top of the screen.
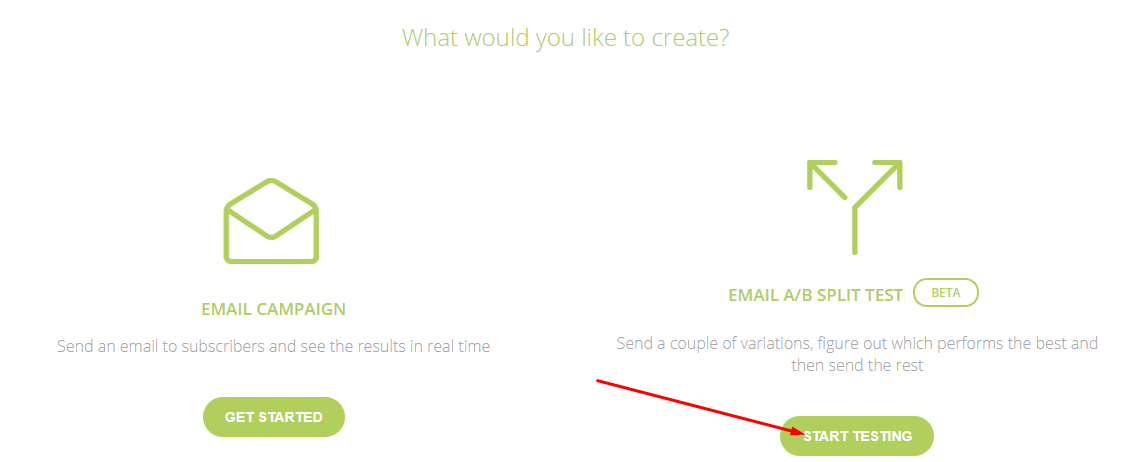
Step 3: A popup will appear giving you the option to select the type of campaign you would like to send. Select the "A/B Split Test" option...
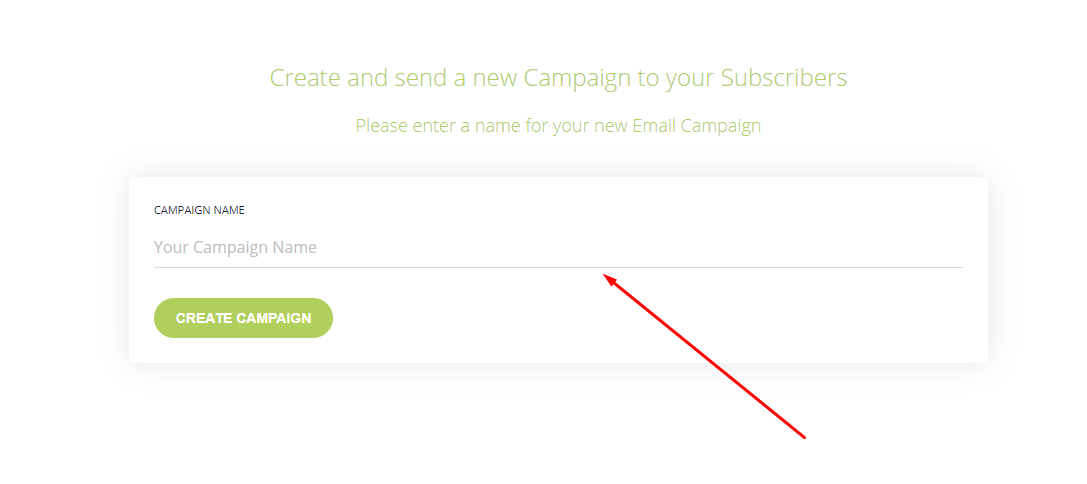
Step 4: You will be prompted to give your new campaign a name. This is a friendly name for your reference only so enter something that will remind you what this campaign is all about.
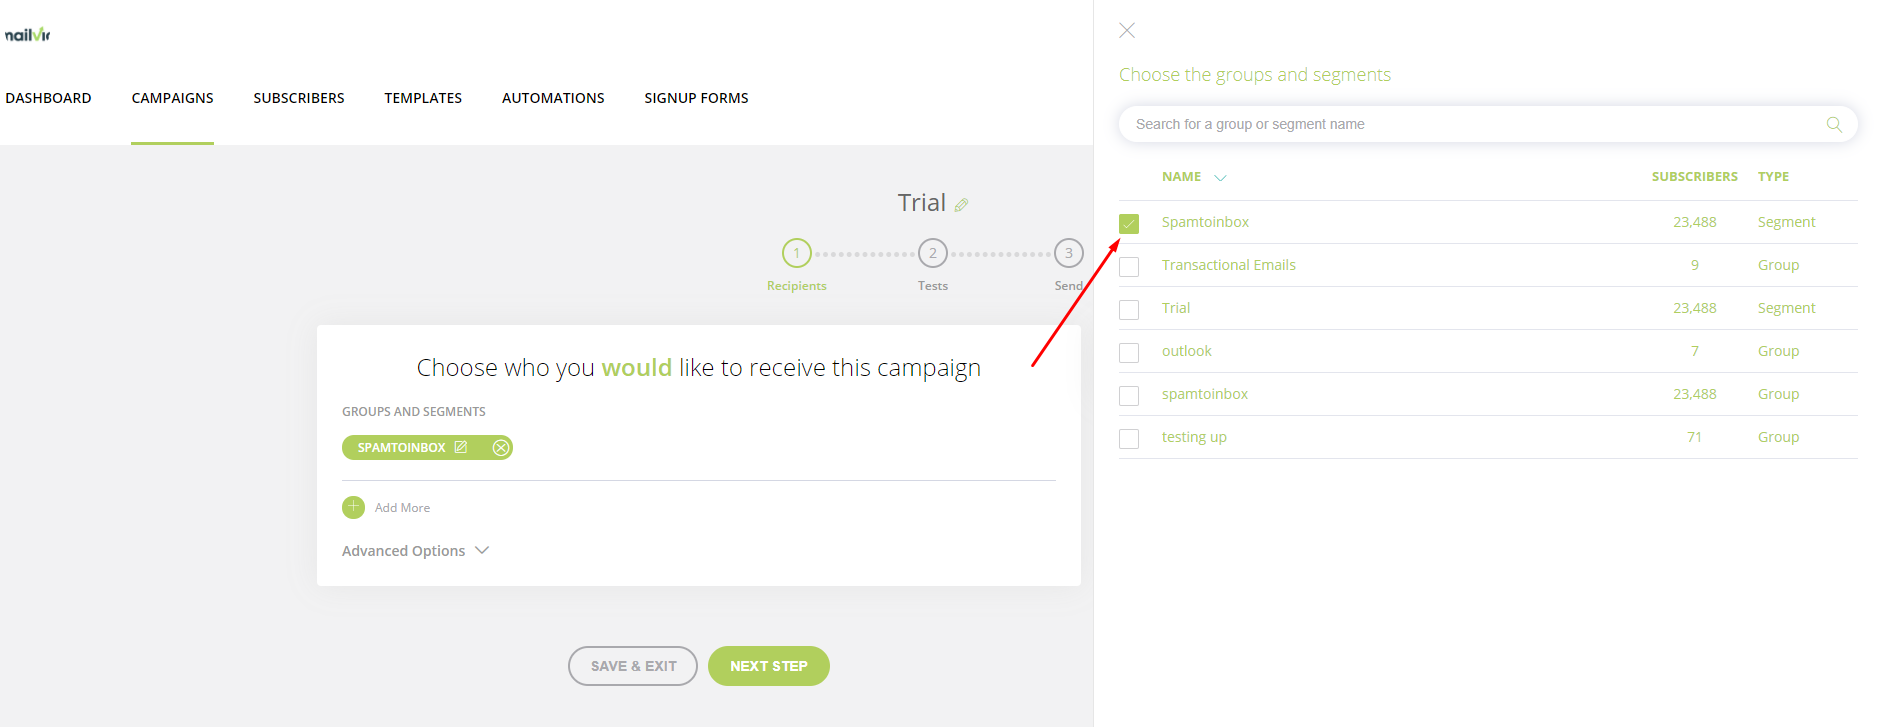
Step 5: Now choose the groups OR segments that you would like to receive your email. You can actually select multiple groups and segments here.
If there are duplicate subscribers across groups and segments we will only send one email to them. We will also not send it to anyone who has unsubscribed, hard bounced or is on your blacklist.
You can even select groups and segments that you DON'T want to be included. So, for example, you could send it to a group but select to not send it to your Hotmail segment. This would then remove any Hotmail addresses from the groups you have selected to send to. Pretty neat eh!
When you are finished adding groups and/or segments, click the "Next Step" button towards the bottom of the page.
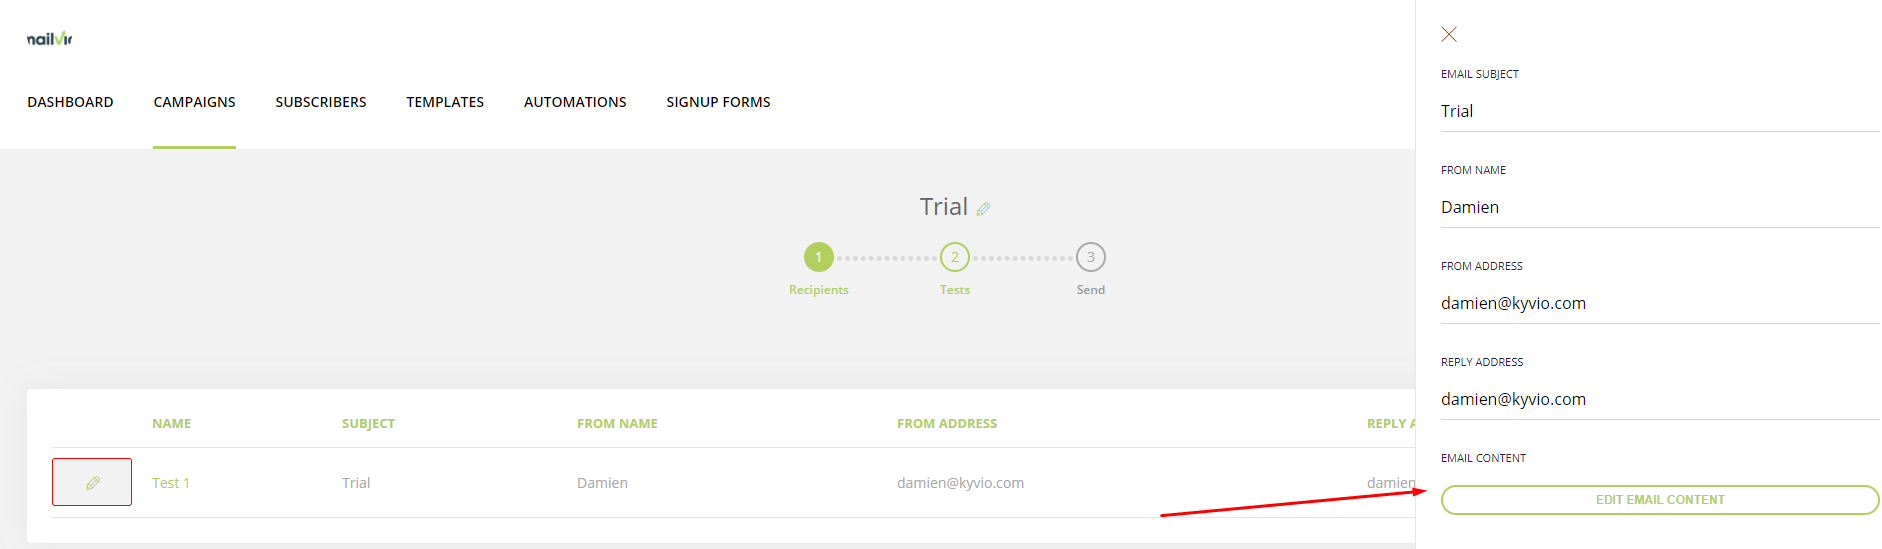
Step 6: You will be taken to a page that enables you to set up your tests. A test comprises of a Subject Line, the name the email is coming from, the email address the email is being sent from, and the email content itself.
For an AB Split Test, you will need to add at least two tests before you will be able to proceed.
The total number of tests you can add depends on the number of subscribers you are sending to. For example, if you are only sending to two subscribers, you will only be able to send two tests.
Click the Add A Test button to create your first test.
Step 7: A drawer will slide onto the page which contains the fields needed to set up your test. Enter an email subject, the name the email will come from, the email address the email will come from, and the email address you would like replies to go to.
Once you have entered all fields, a button will appear that says "Edit Email Content" click this to design your email template.

Step 8: Select an email template to send. You can create a new template from scratch, select a pre-made theme from the Theme Marketplace, select a template from your saved themes, or select a template you sent via an older campaign.
Note: If you choose a previous campaign or saved template a copy is made. Your original template will remain unchanged.
Step 9: Create the template to be sent through this campaign. Here's a handy guide on editing templates.
Once done, click the "Save and Continue" button located towards the top right of the email editor.

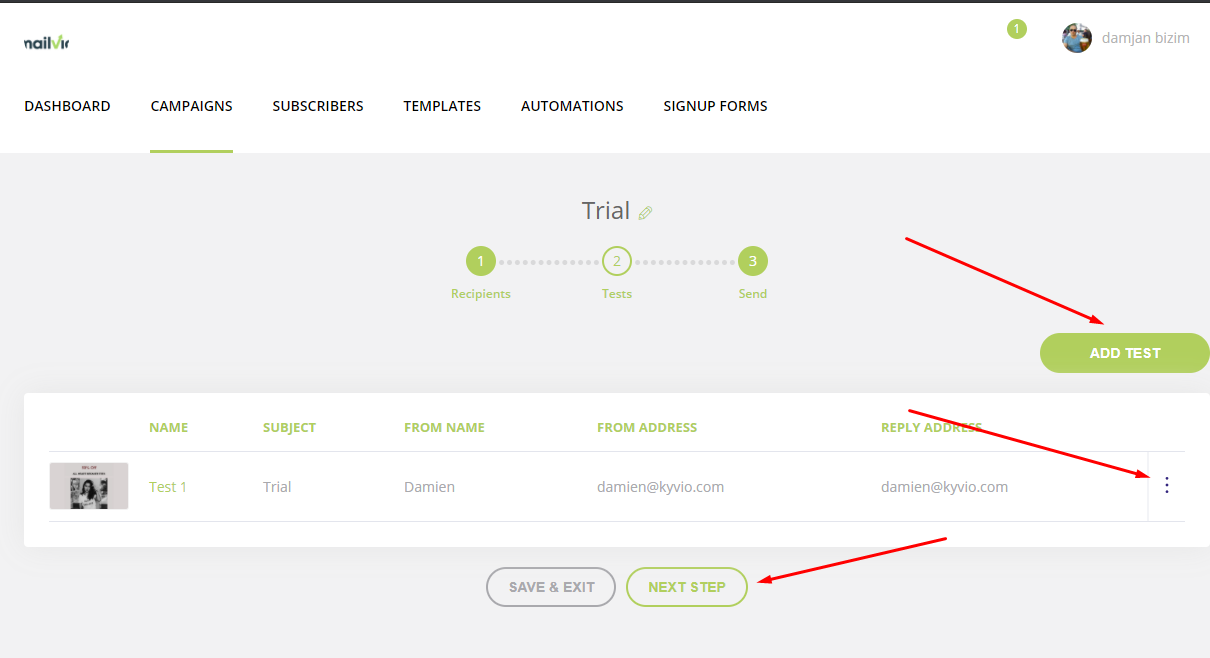
Step 10: You will be redirected back to the screen where you can add and edit your tests.
You can now continue adding new tests by clicking the "Add Test" button, you can edit the test you just added by clicking either the test name, and you can delete or duplicate the test by clicking the three little dots towards the right.
It's handy to duplicate tests if, for example, you would like the content to stay the same, but you would like to adjust just the subject line.
Once you have added at least two tests, click the NEXT STEP button located towards the bottom of the screen.
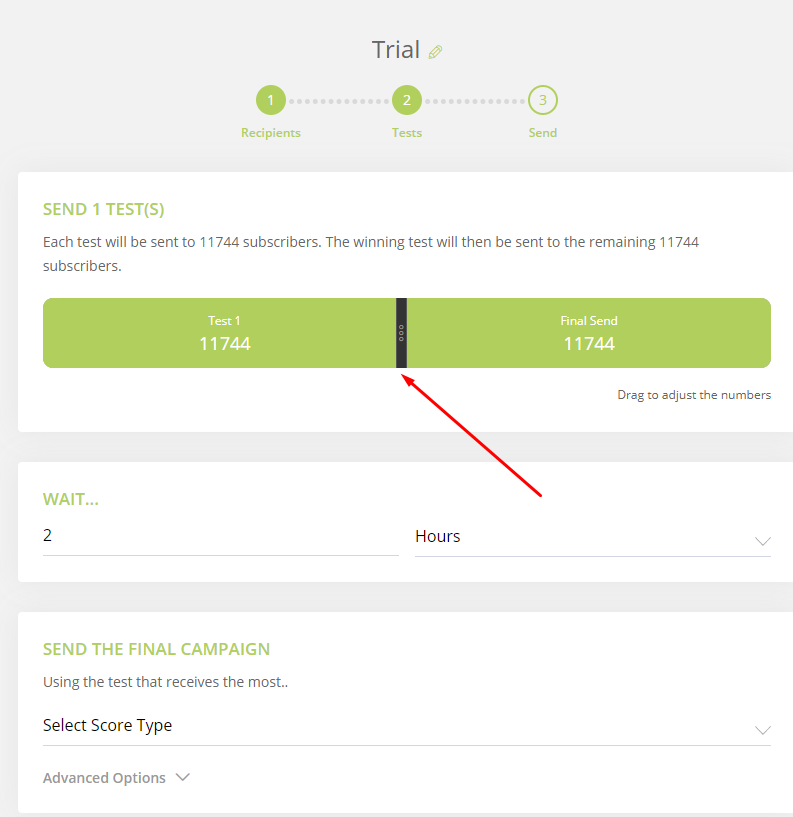
Step 11: You will now be presented with some options regarding the sending of your new AB Split Test campaign.
You can adjust the number of subscribers who will receive the tests and the final send by dragging the bar highlighted in the screenshot below.
By default, the tests will be sent to 50% of the audience, and then the winning test will then be sent to the remaining 50%. However, sometimes it's useful to lower or increase this split.
You can also adjust the time to wait until the winning test is decided. It is a good idea to set this to around 2 hours, just to give your audience enough time to interact with your emails.
You can also select the metric that will determine the winning test. By default this will be set to "Total Opens", the total number of subscribers who open each test. But you can choose to test for clicks instead.
Step 12: Finally, you can set the date and time that you would like your tests to start. Once set, review the page, make sure everything is correct and click the "SEND CAMPAIGN" button located towards the bottom of the screen.
Your campaign will now be queued and sent based on the start date/time you entered.
You did it!
Congratulations, you have sent an AB Split Test campaign. It wasn't too hard to set up, was it?
Feel free to experiment with all the options covered above, send different tests, change templates, alter subject lines and find out just what your subscribers love the most.
Monitoring the Results
Split testing would be pretty useless if you couldn't see what happened once the test was sent so we have put together a suite of views that enable you to see exactly what has happened.
View your new split test by going to the "CAMPAIGNS" area, and clicking on your AB Split Test. You can easily see your AB Split Tests, they have a different icon than normal campaigns...

When viewing an AB Split test, all of the statistics from the main view related to the whole campaign. So, for example, the opens, clicks, unsubscribes, etc relate to all tests and the final send.
You will also see a new tab called "Tests" which is unavailable on a normal campaign. From this Tests tab, you can see all of the tests you sent, along with the winner.
Clicking on any of the tests will take you into a full breakdown of statistics for that individual test.

And that is AB Split Testing in a nutshell.