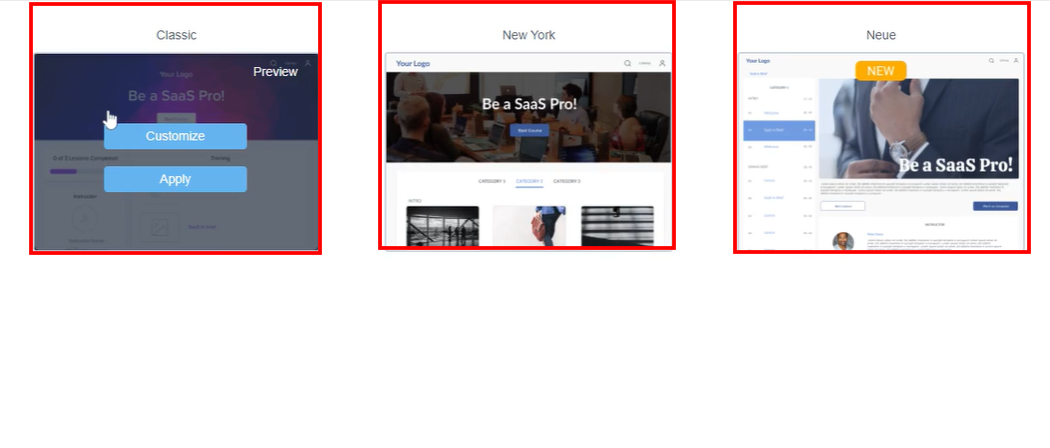
Kyvio is an all-in-one business platform designed to take your business to the next level. In this section, I'll explain how you can connect your sales funnel with your course and effectively start selling it. Within the 'Sites' feature of Kyvio's funnels, you'll find three ready-to-use templates. Simply choose the one that best suits your needs and begin setting it up to promote and sell your course”
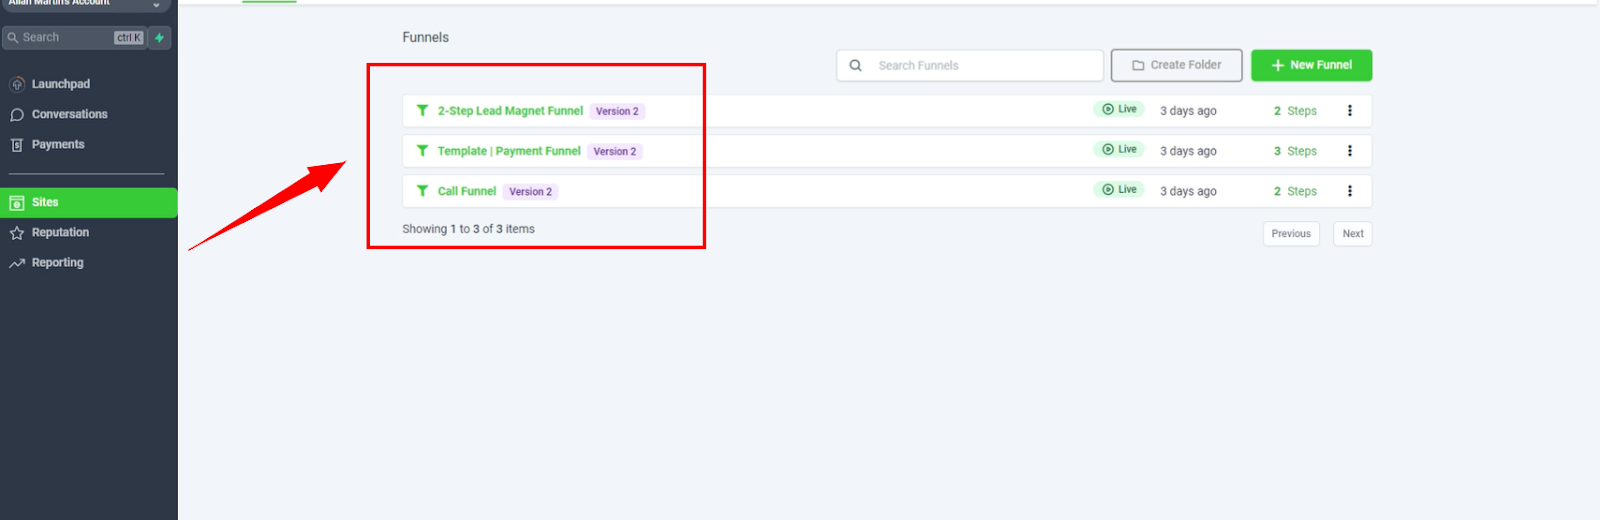
There are three templates shown in the above image, and you can choose the one you prefer to set up your course for sale. To begin, you need to access the "Memberships" section under "Products." Once you're there, you'll find a pre-existing template that you can utilize. Clicking on it will reveal the current structure. Within this structure, you can upload your lessons to fill in the skeleton.
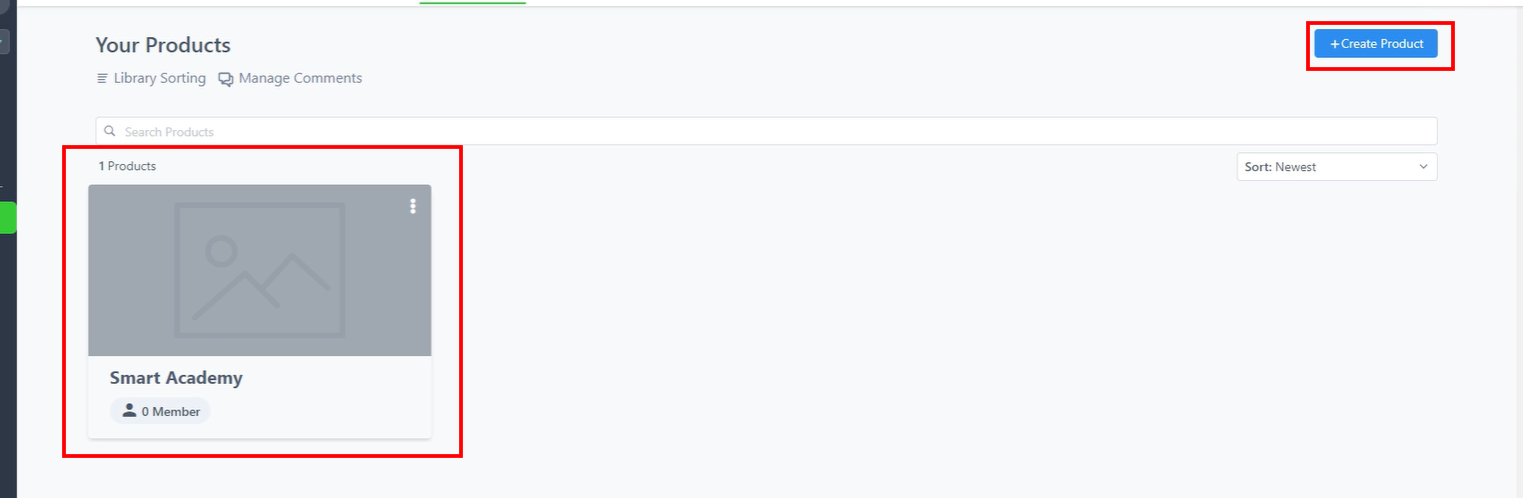
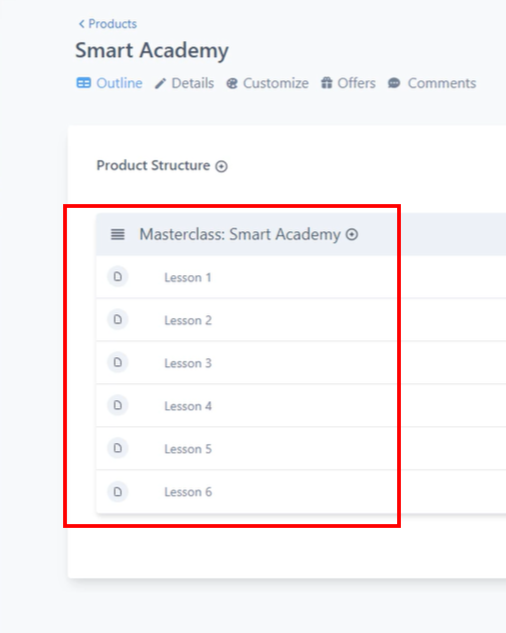
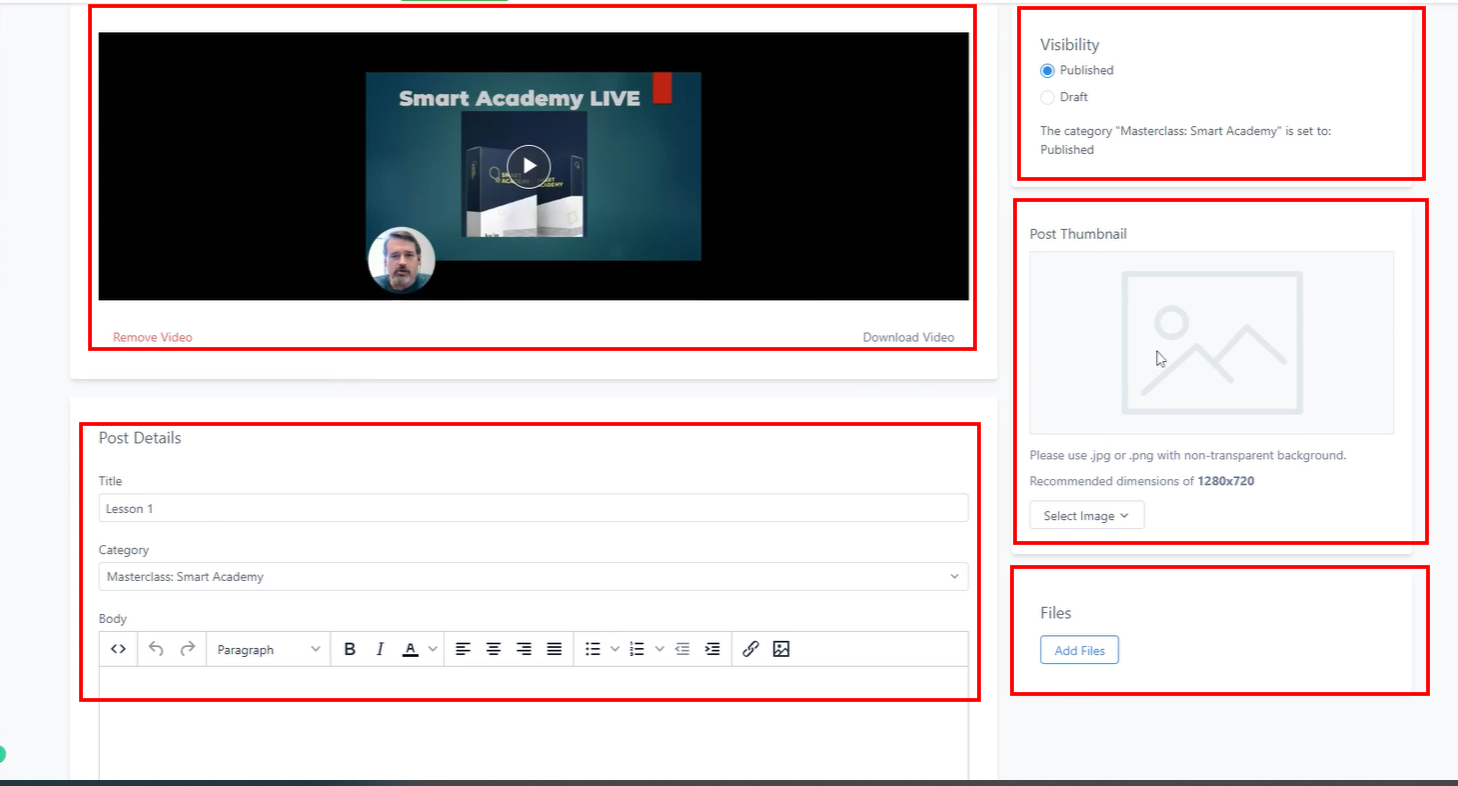
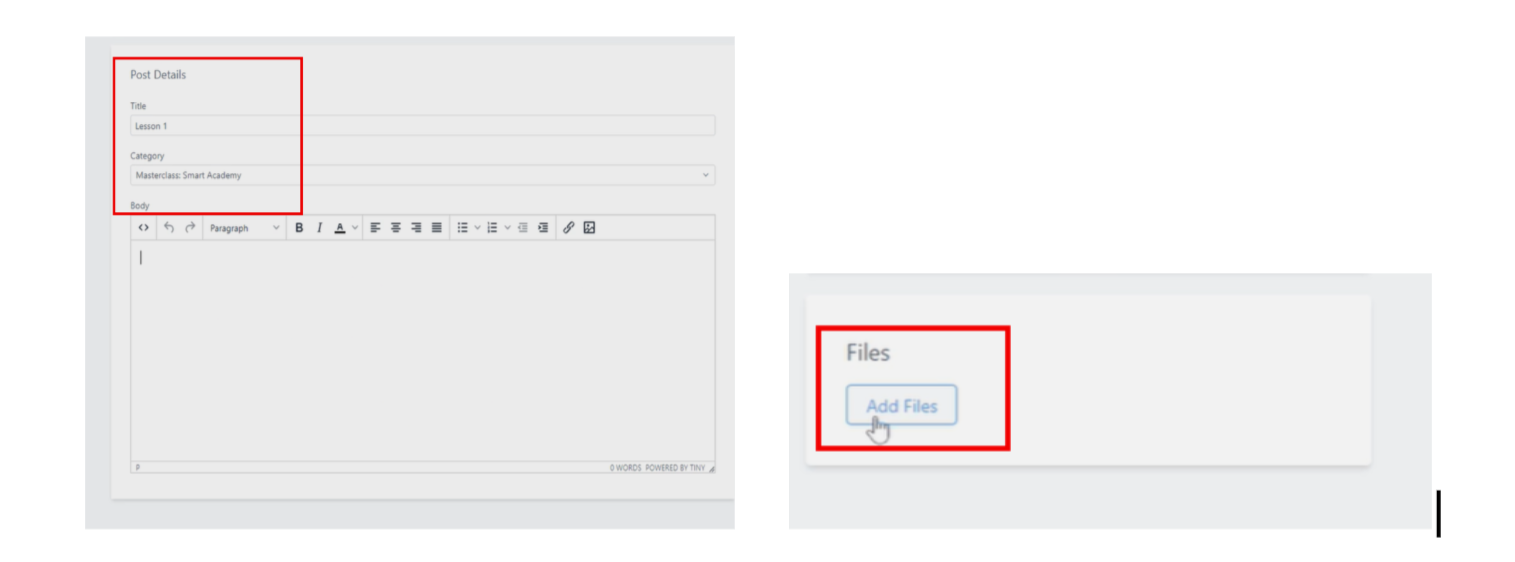
You have the flexibility to create new categories, subcategories, adding of a PDF file and annual lessons to your liking. Adding a category is as simple as clicking the plus sign and creating a new category. If you wish to edit an existing category, you can click on it and modify the title to suit your needs. Similarly, you can easily edit a thumbnail by selecting it and making the necessary changes. Once you've made the desired modifications, simply save your changes and go back. So that's how you create your course inside the membership area. And when you are done, you can also preview it to see how it looks.
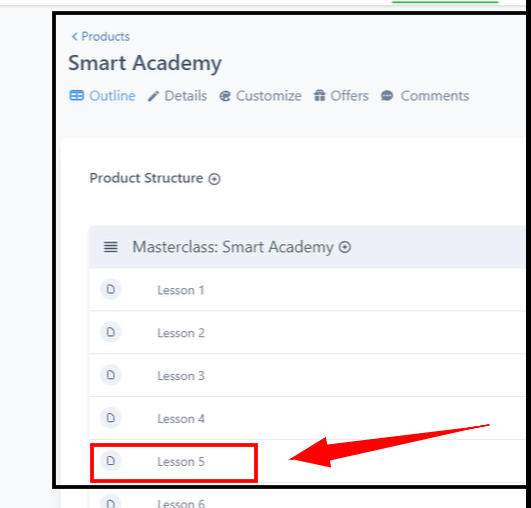
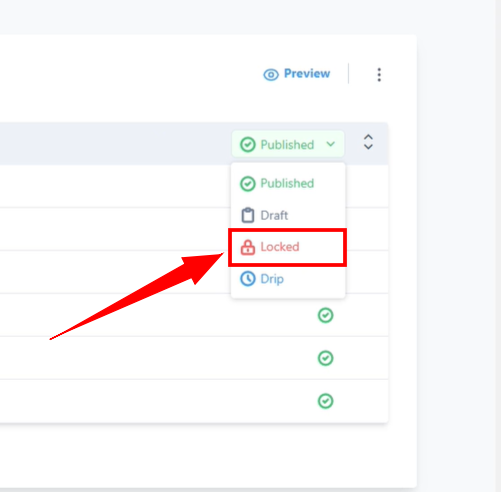
And another useful feature for your clients is the option to lock certain modules until they have completed the previous ones. For instance, if your course consists of five modules, you can restrict access to the fifth module until they have successfully finished modules one to four. This lock system ensures that clients follow the intended progression and fully understand the foundational concepts before moving on to more advanced material. Additionally, you have the option to implement a drip-feed system where modules are released gradually over time. This approach allows for a structured learning experience, as clients receive new content at predetermined intervals, keeping them engaged and preventing overwhelming information overload. Alternatively, you can simply publish all the modules at once, giving clients immediate access to the entire course. The choice ultimately depends on your preferred method of delivering the content and meeting your clients' needs.
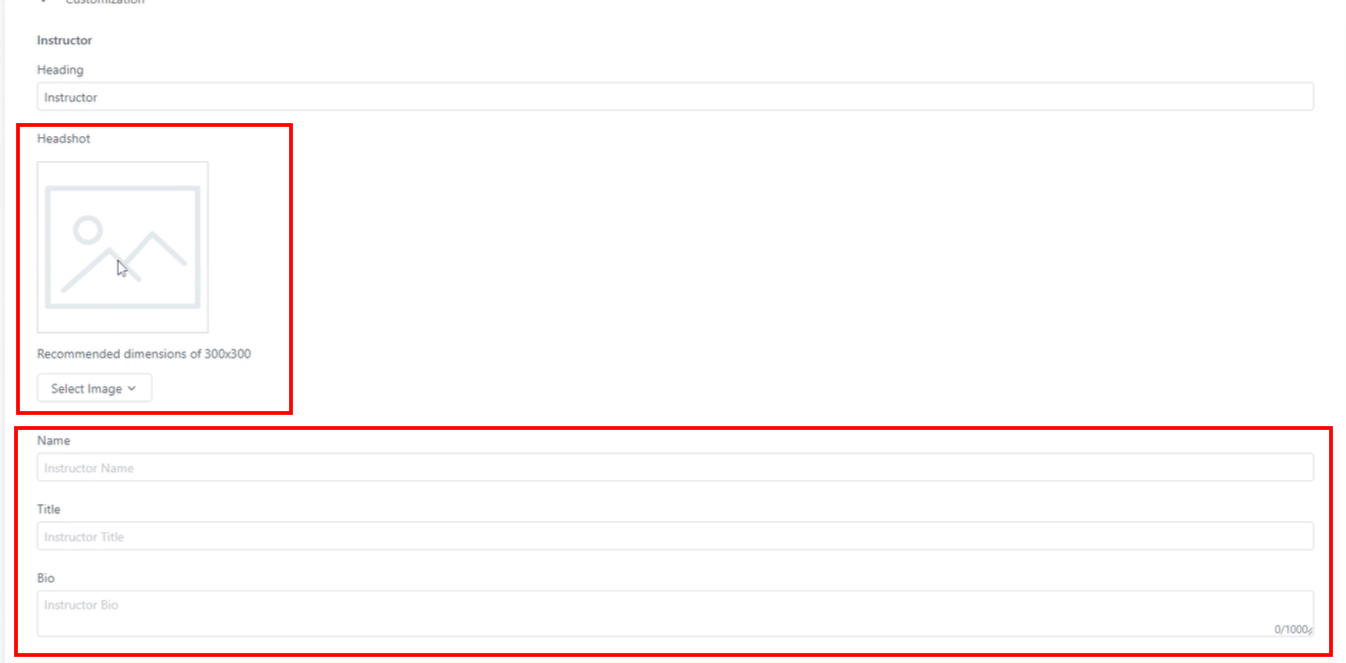
Next in details, you can customize your course details with a captivating name, compelling description, and a visually appealing thumbnail. Personalize your profile with a picture, name, title, and bio to connect with your audience and build trust. Incorporate your logo or favicon for brand identity and a cohesive visual experience. Leverage these customizations to create a professional, engaging, and unique learning environment that captures your audience's attention.
Here, it provides a selection of templates for customization to meet your preferences. Choose from our diverse collection and easily start using them with a default template. If you want an alternative option, access the customization feature to effortlessly select from other templates. Discover and choose the perfect template to enhance your professional journey.
Once you have finished creating your course, navigate back from "Products" to "Memberships" and select "Offers" from the dropdown menu. Here, you can create an offer specifically for your course. If there is already an offer created, you can make modifications or improvements to enhance its quality.
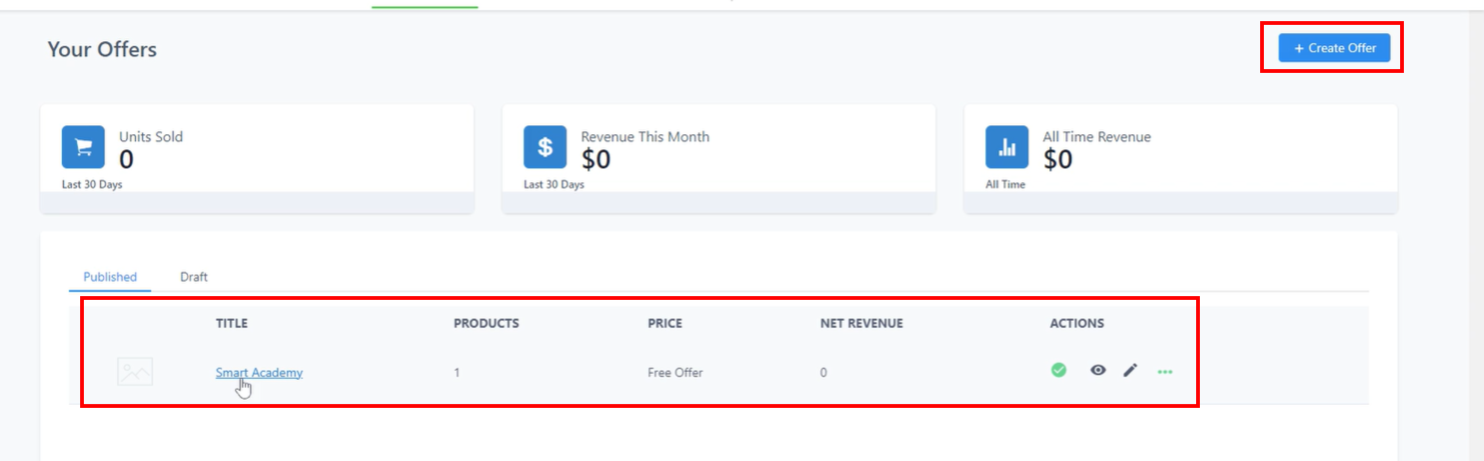
When titling your course, include the course title. If you wish to specify the cost, such as $3500, use a format like "Smart Academy 3500." This helps you remember the selected price. Ensure to include this product in the product slot. This is basically your course.
To connect your course, click on "+Add Product." If you have multiple courses and want to choose a specific one for your offer, easily select it from the options. You can also enhance your listing by adding a thumbnail.
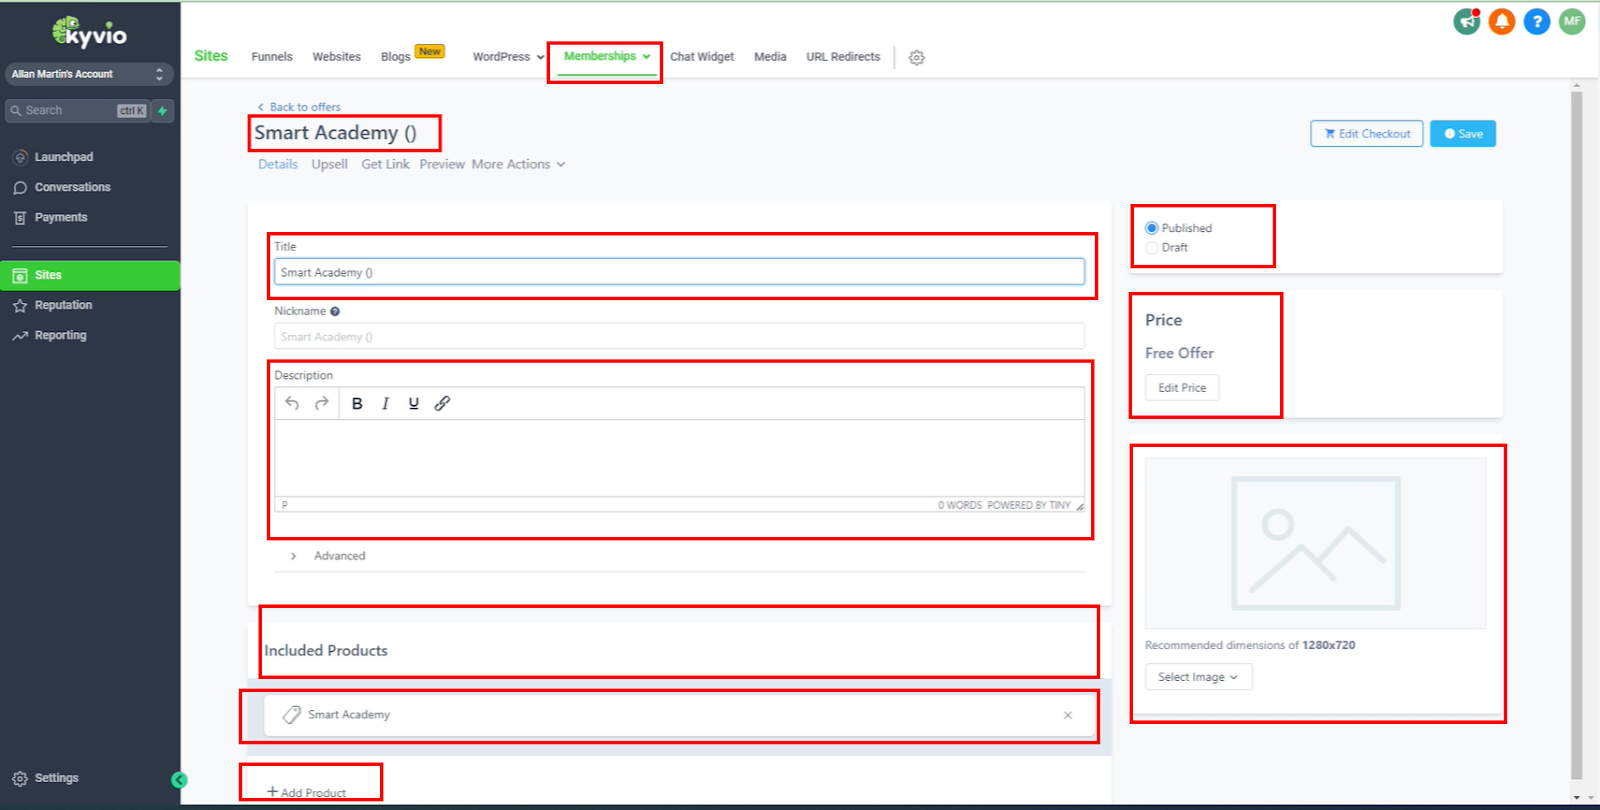
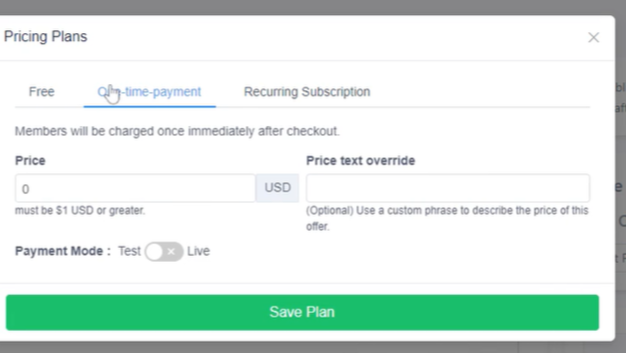
For price adjustments, utilize the provided editing option. Whether you have a single product, a one-time offer, or a subscription, you can add it accordingly. This streamlines the process of managing and presenting your course on the platform.
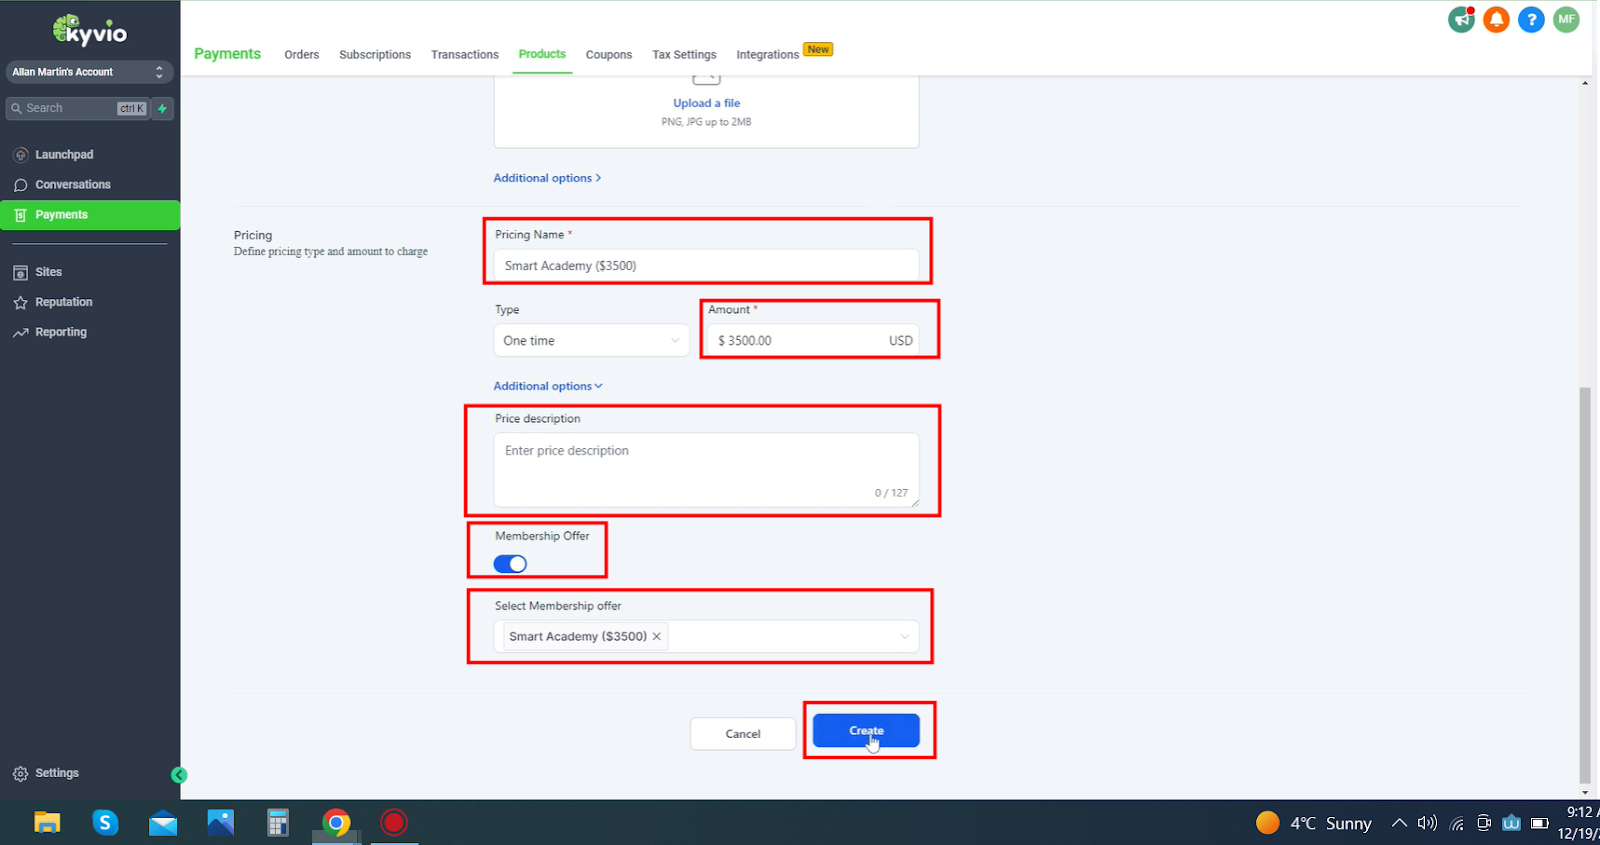
To add the product to the smart Academy, navigate to the payments section. When setting up the smart Academy product, enter the name in the "Product Name" field, and then copy and paste the same name in the "Product Type" field—designate it as a digital service, as it's a course. You can provide a detailed description of the course, including the number of modules and the type of content it offers, in the product description section.
The price for the course is $3500. Ensure to click on the additional options under the membership offer. By toggling this option, you'll be able to select the smart academy as the offer created within the membership offers. Select the appropriate offer to grant access, and then click on "Create" to finalize the setup.
Now that the product is created, you can navigate to the Membership Offers section to ensure that our product is successfully associated with the offer. Once confirmed, return to the previous section.
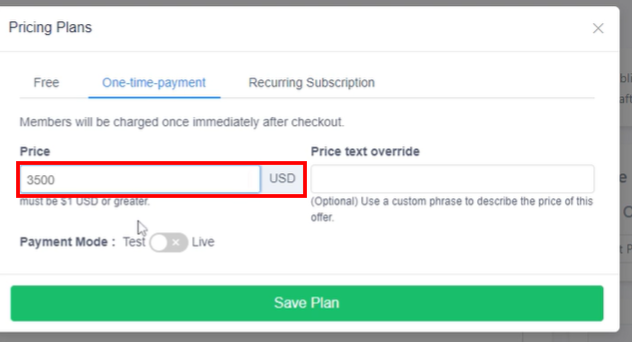
In this section, you can set the price as a one-time payment, and specify the amount as $3500. After that, activate the plan and then save it.
The offer has been successfully prepared. Now, let's return to the previous section and proceed to the funnels.

Once you've selected the appropriate funnel, it will guide you to the check-out page, where you can then click the “Product.”
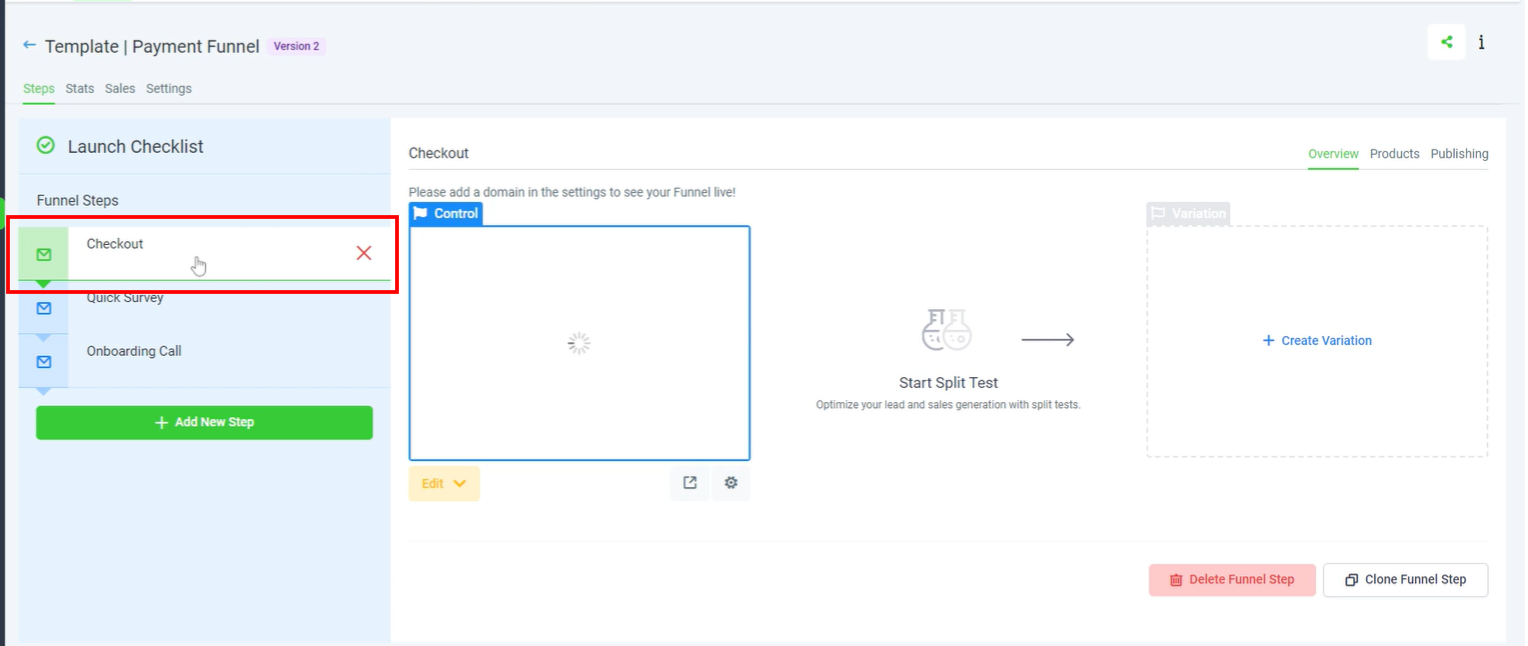
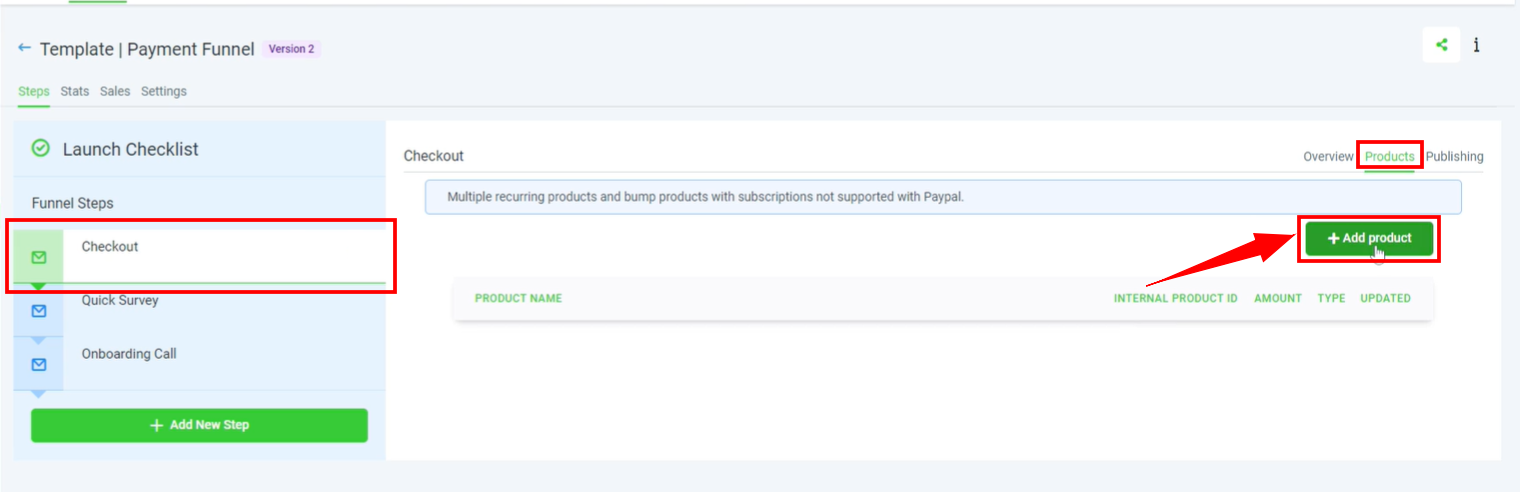
Here, you can add product by hitting the “+Add Product”
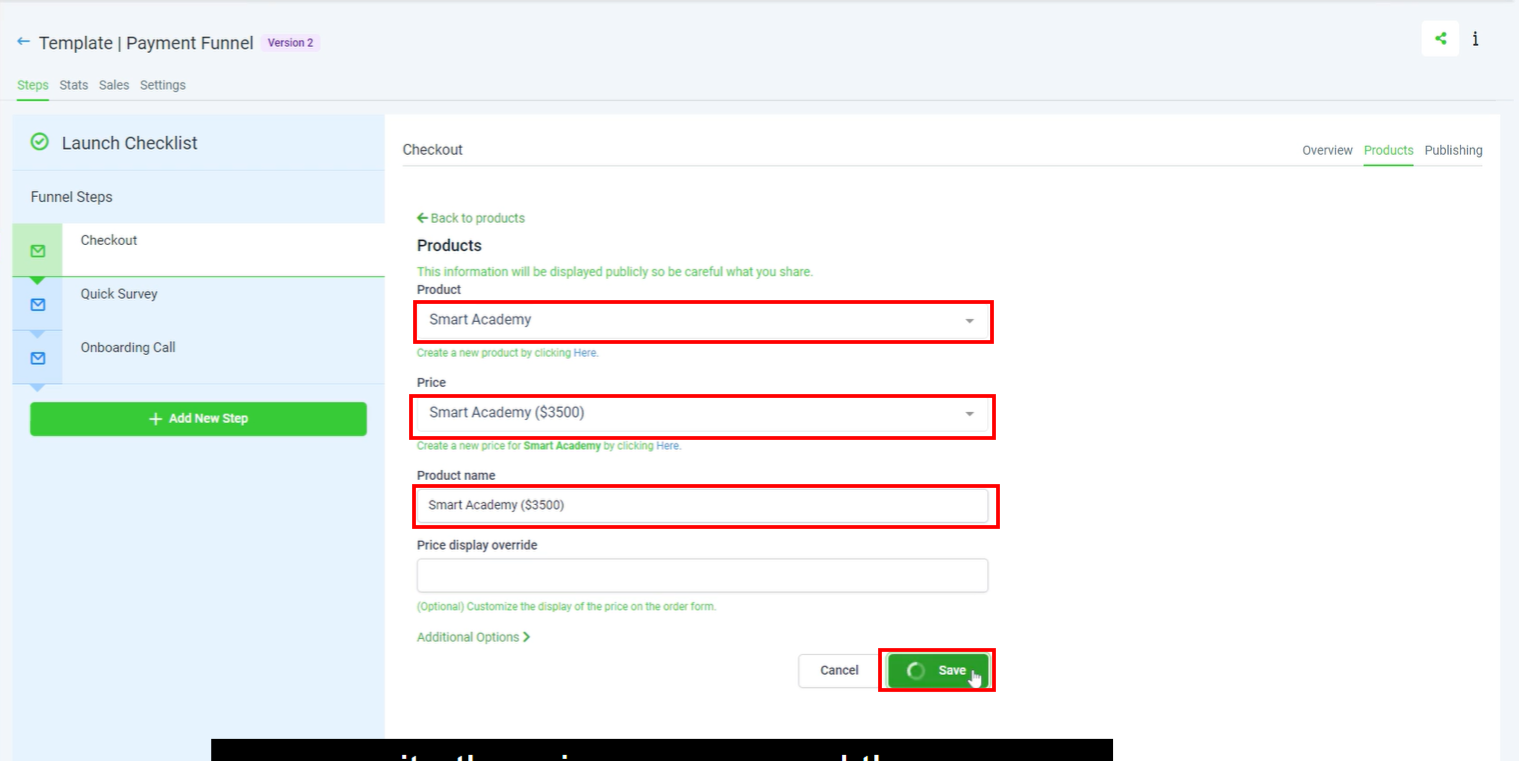
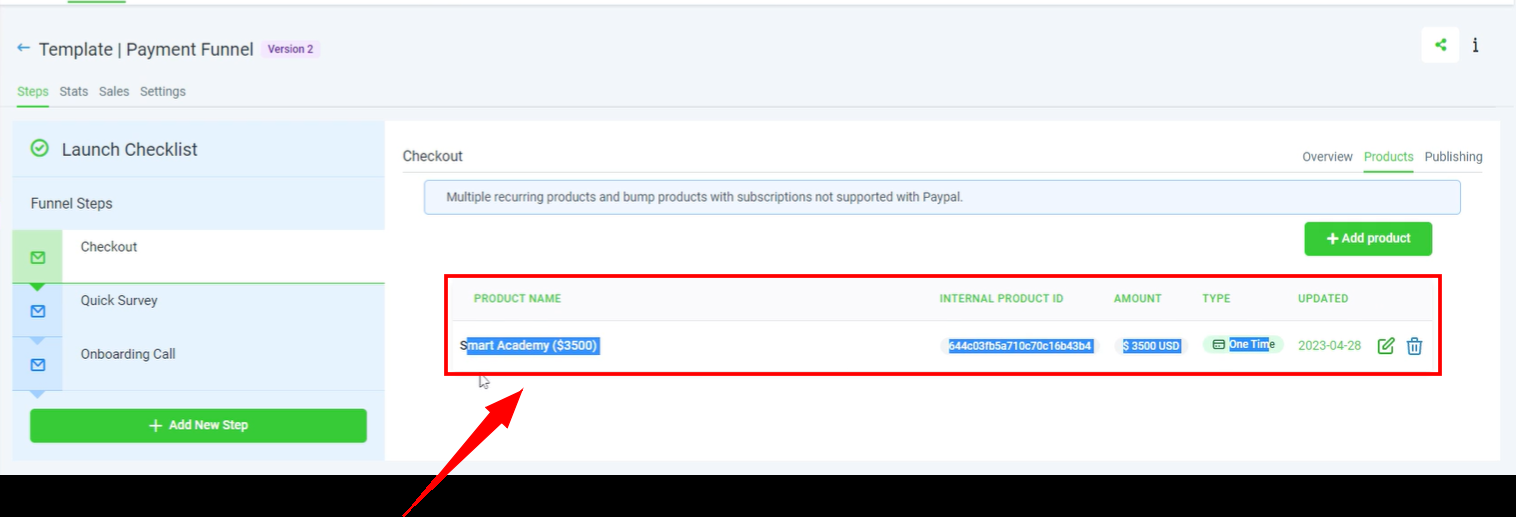
Click on the dropdown menu labeled "Product" to reveal the option "Smart Academy." Next, click on "Price" to view the actual cost of the course. If you need to modify the product name or update the price, you can do so, and then simply save your changes.
On the following checkout screen, you will be able to view all the details such as "Product Name," "Internal Product ID," "Amount," "Type," and "Date Updated."
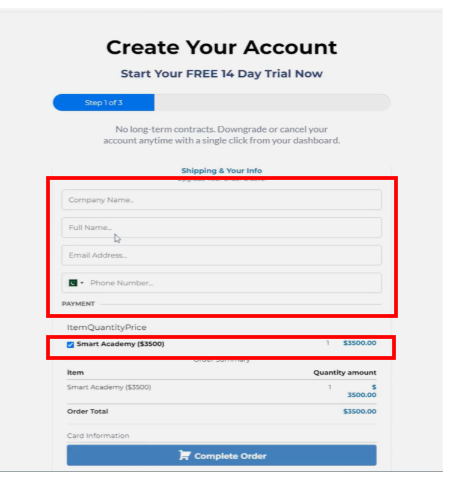
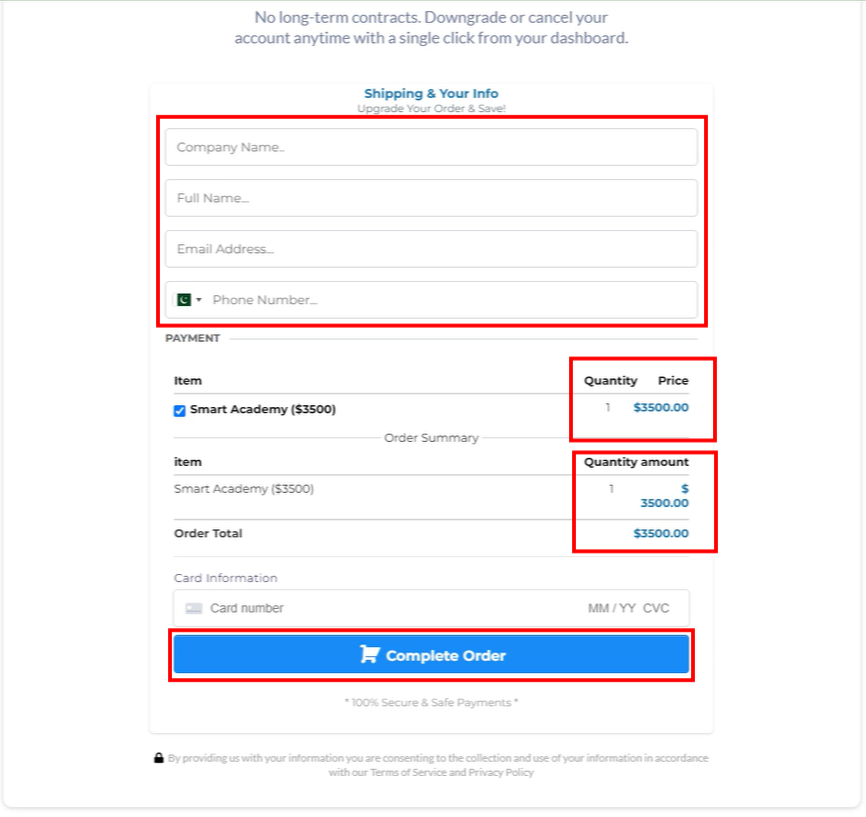
If you navigate to the overview and view the funnel preview page as depicted in the image below, you can visualize how the product appears. At this point, your users only need to enter their company name, full name, email, and phone number, and then proceed to enter their credit card information to complete the purchase. We will charge them $3500.
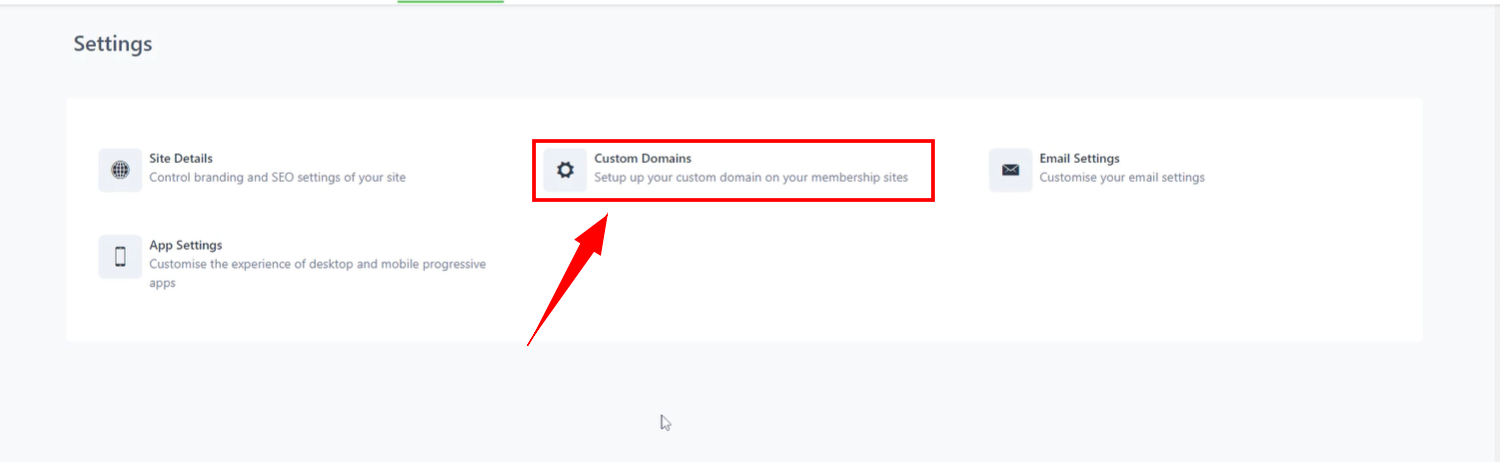
Furthermore, you also need to connect a domain to your funnel before sending out this checkout page to people to sell your course.
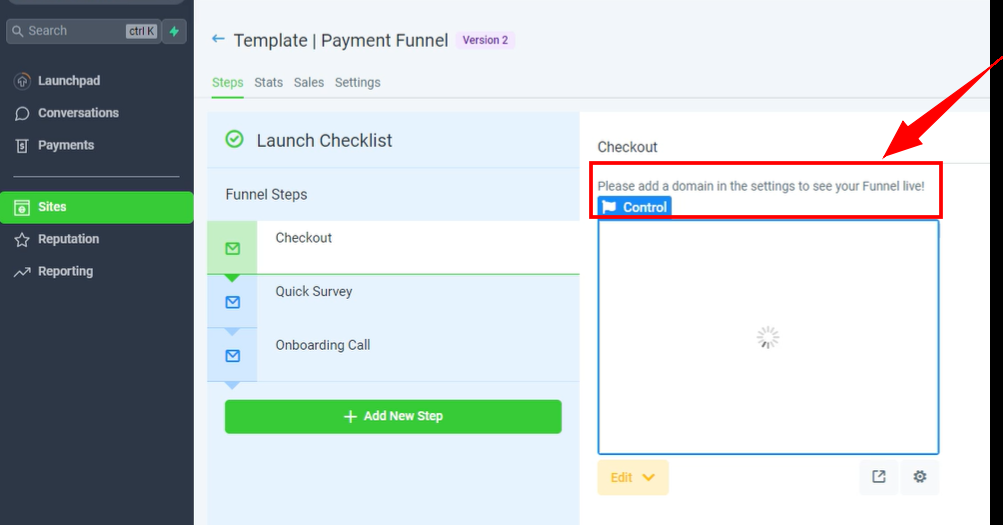
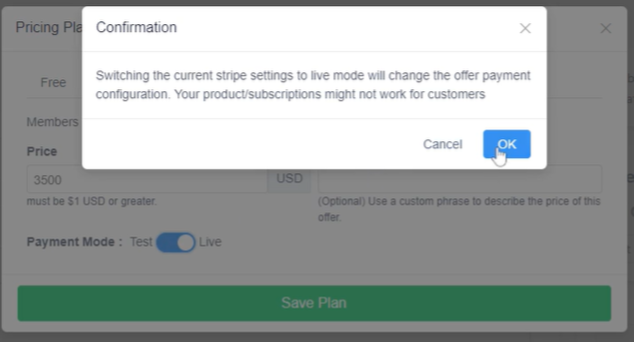
After that, simply go to settings, navigate to the main section, and add a domain there. Once you're done, you can return and send it to the people. This is how you can launch your course to your audience. You can also test it by clicking on settings, where you can verify that the Payment mode is correct. If you want to test the checkout page, for instance, to see how it works, you can switch it to test mode, then save your changes.
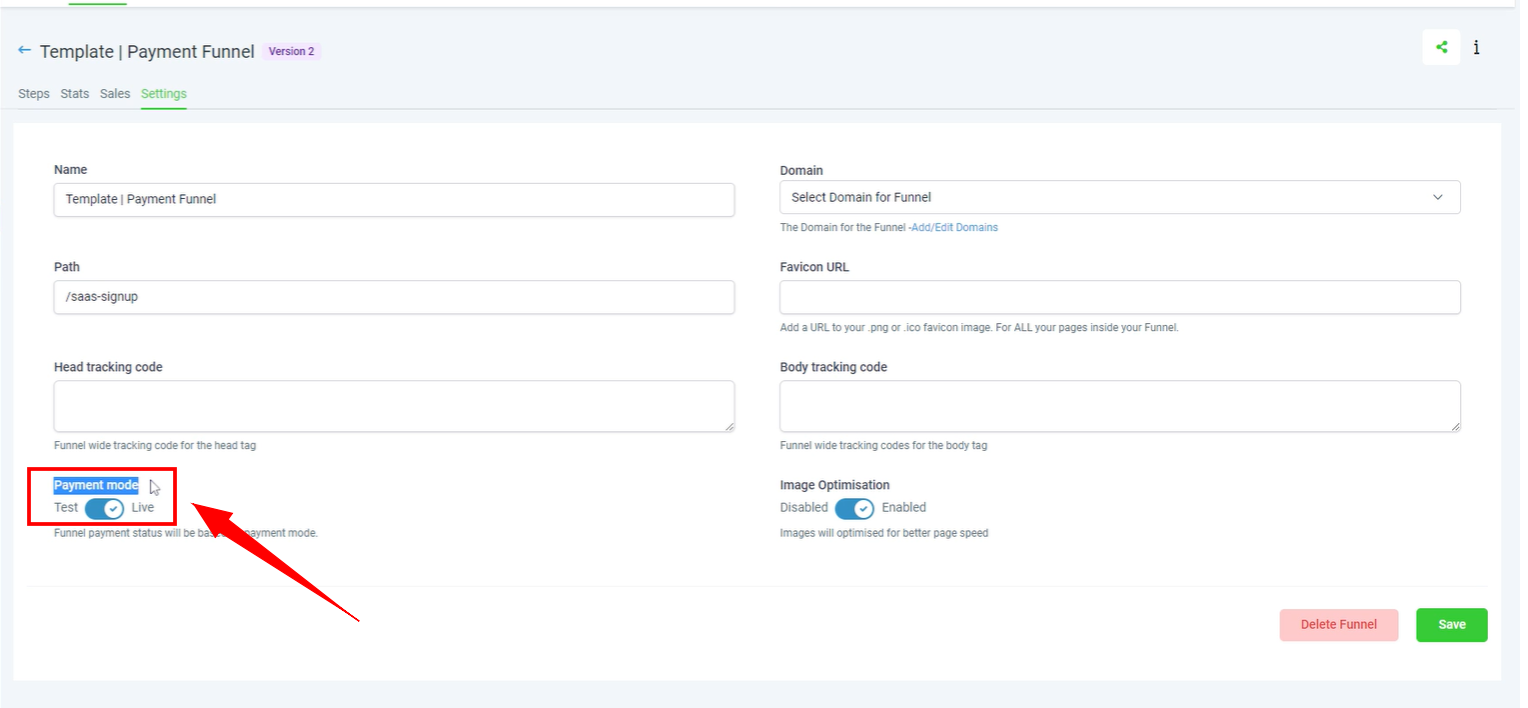
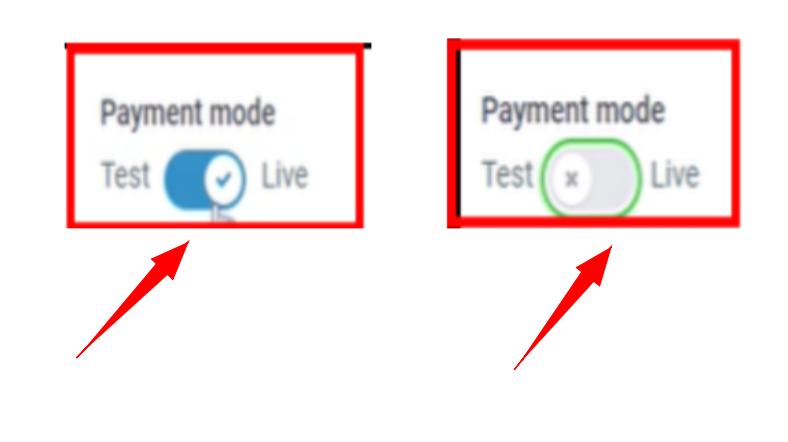
Afterward, open the preview page, or simply refresh it if it's already open, and you will notice that the test mode is now live. You can enter your "Company Name," "Full Name," "Email Address," and "Phone Number" in the designated slots and then click "Complete." This should work as you expect.
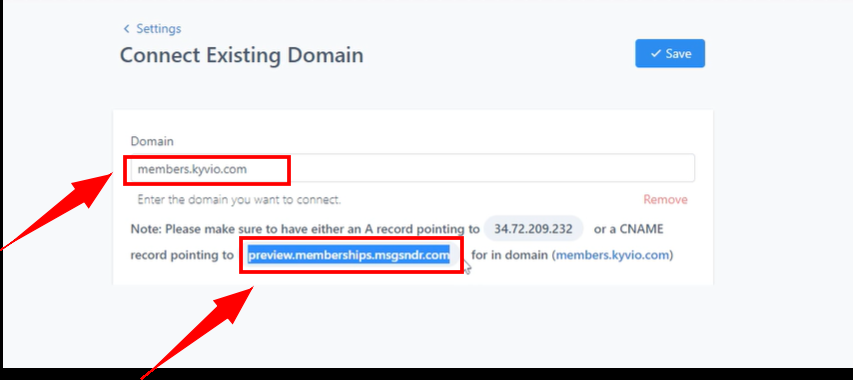
To create your sales funnel, you can make changes to the funnel page according to your preferences and then start selling your course to your leads. One thing you can also do is add a custom domain to your course. For example, if your domain is "members.kyvio.com," you just need to add the CNAME "preview.membership.msgsndr.com" to your domain hosting.
If you use a service like GoDaddy for your domain hosting, you can go to your DNS records, add a new record, choose "CNAME," and then in the name field, write something like "members" or "members community," and in the value field, paste "preview.membership.msgsndr.com." You can set the TTL to a minimum amount provided by your hosting, such as half an hour, five minutes, or 600 seconds, and then save your settings.
After configuring your domain settings, you can go to your course's membership settings, add your custom domain, and save your changes. Once it's saved, you can easily distribute the login URL to your clients. If a client loses their email and needs to access their account, you can send them the URL and ask them to log in with their credentials. This is how you can connect your custom domain.
The next step involves configuring your email settings. To proceed, simply click on "Email Settings."
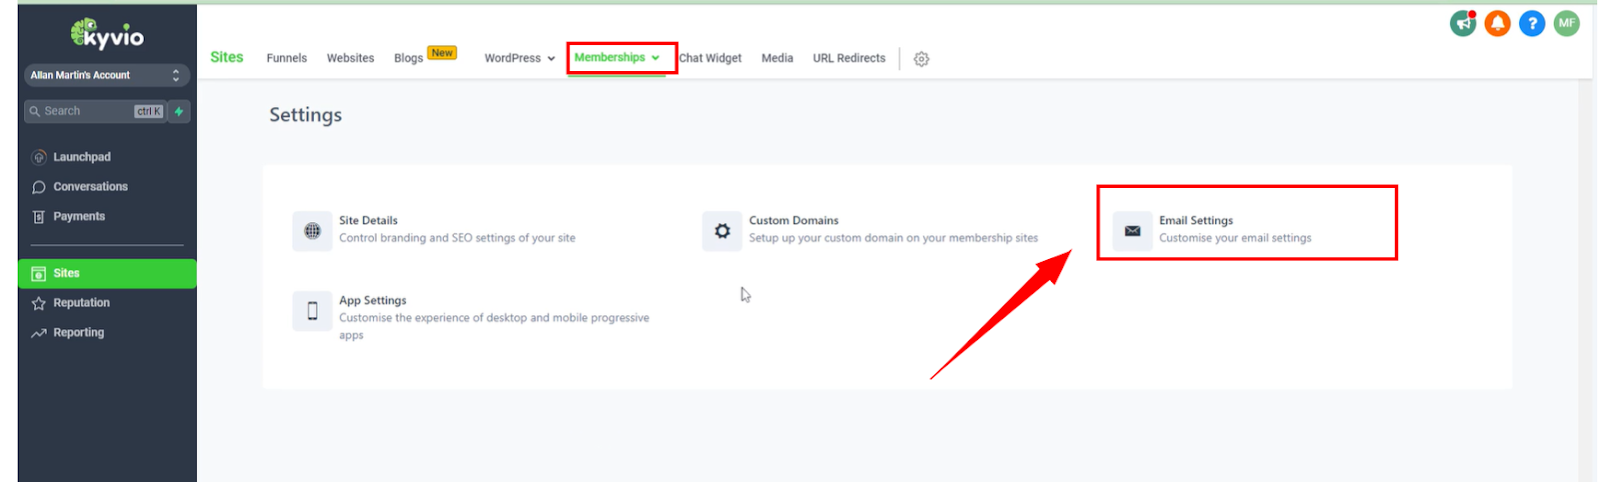
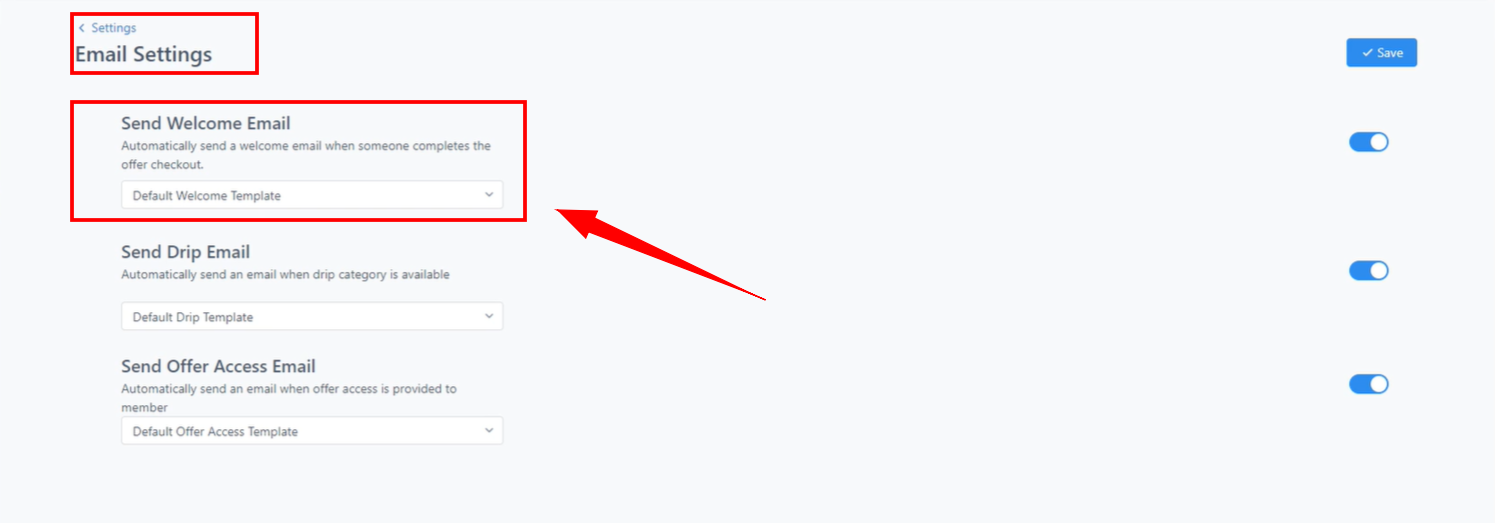
Apart from that, you don't need to concern yourself with the email settings; they are already configured. The default welcome template is readily available. You can conveniently test it within the funnels here. Upon testing, the default template will be sent to your email, allowing you to preview its appearance. This is how it will be presented to your audience, providing a glimpse of what they'll see when they receive it. This is also the point at which they can log in. The process of automating sales begins with creating your course offering. You can then proceed to establish and configure your products for sale. Subsequently, you'll need to link these offerings to your website, set up an effective sales funnel, and integrate them with a smooth checkout page. Finally, connecting your domain marks the last step before commencing sales. Once all these components are in place, you're ready to start selling your course with a streamlined process.
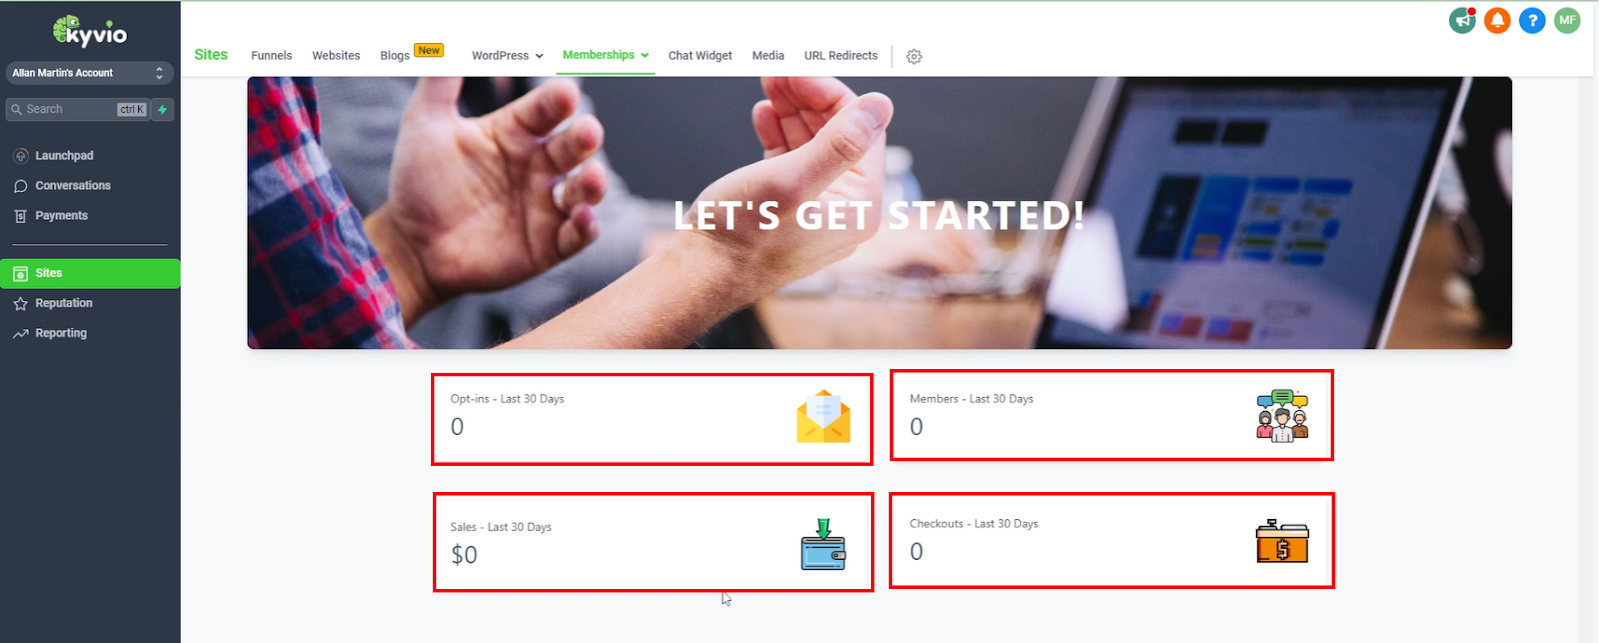
Setting up an automated selling process for your course requires creating and describing your product, integrating it into your website, and connecting it to a streamlined checkout process. Once these steps are done, you can connect your domain and start selling. It's important to ensure a smooth process from product presentation to purchase. The dashboard provides comprehensive details, including the number of options available, the total course membership, completed checkouts, and sales within the last 30 days. This allows you to gain insights into your course performance at a glance.
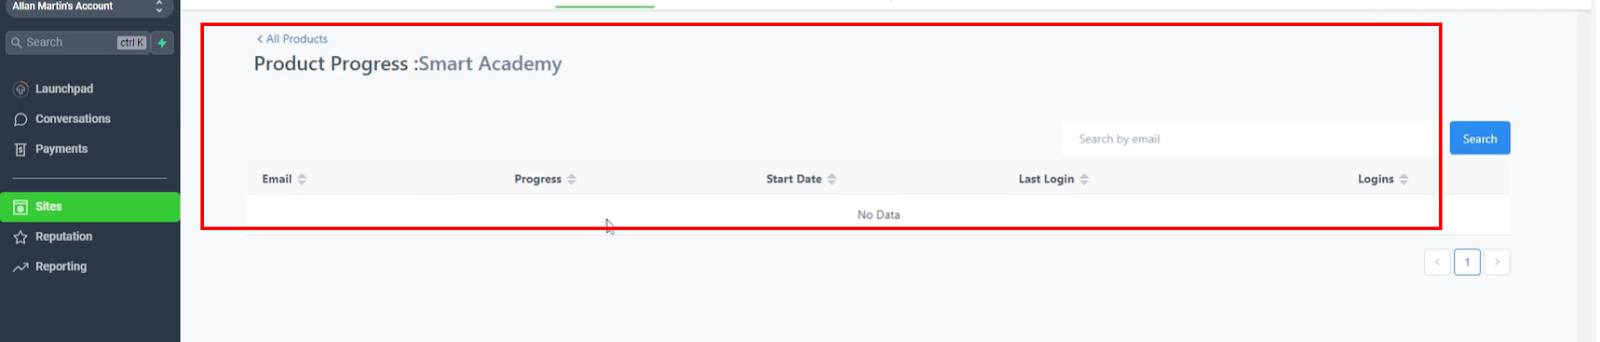
If you wish to closely monitor the engagement within your Smart Academy, including the number of course initiations, progress tracking, and overall course consumption, you will find these details available within the Analytics section.
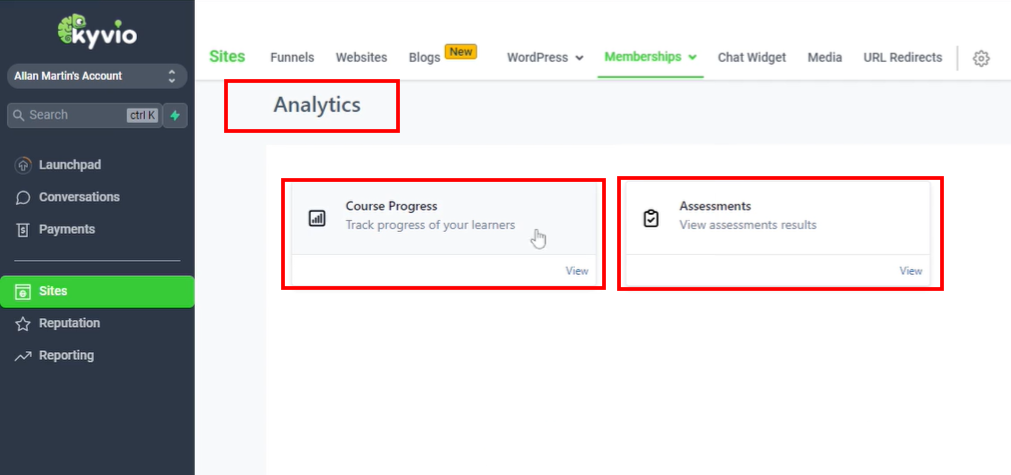
In the Smart Academy, you can track the progress of your products. This includes monitoring client enrollment, assessments,
completion rates, results, and demographics. All this information is accessible within the Analytics, providing valuable insights as you launch your course within the Kyvio system.