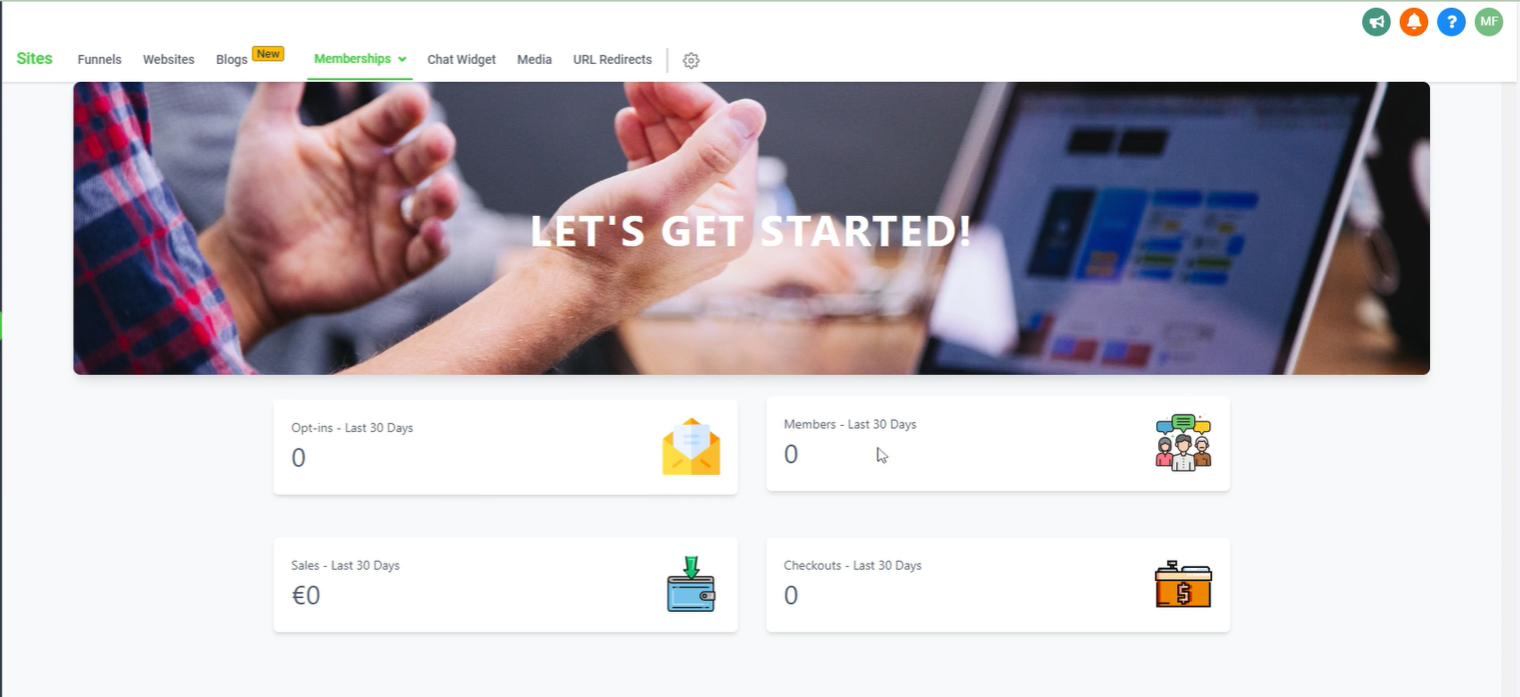
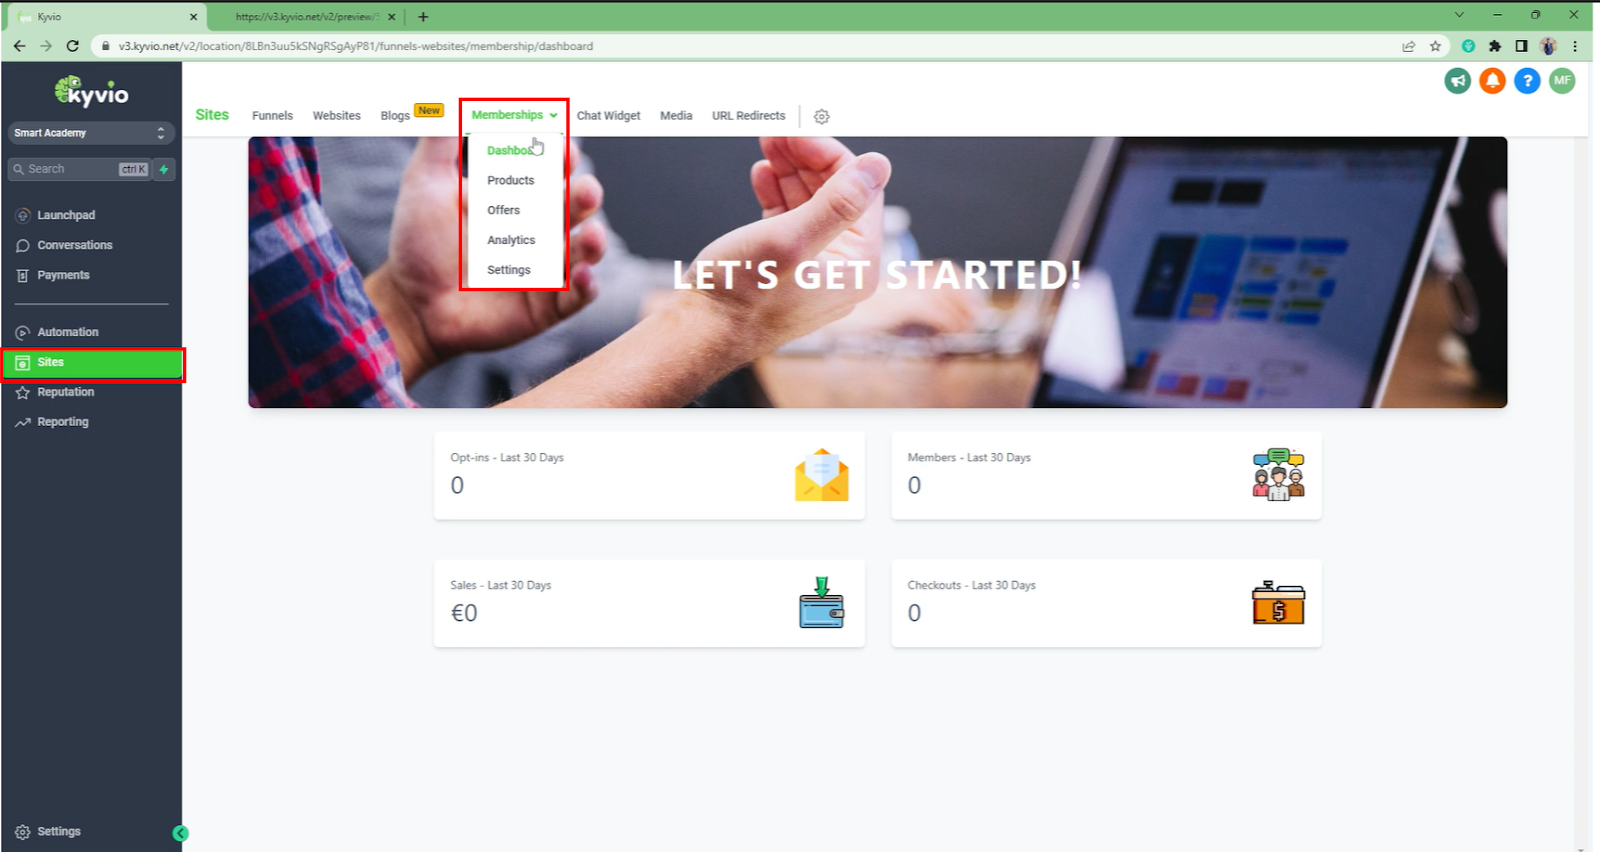
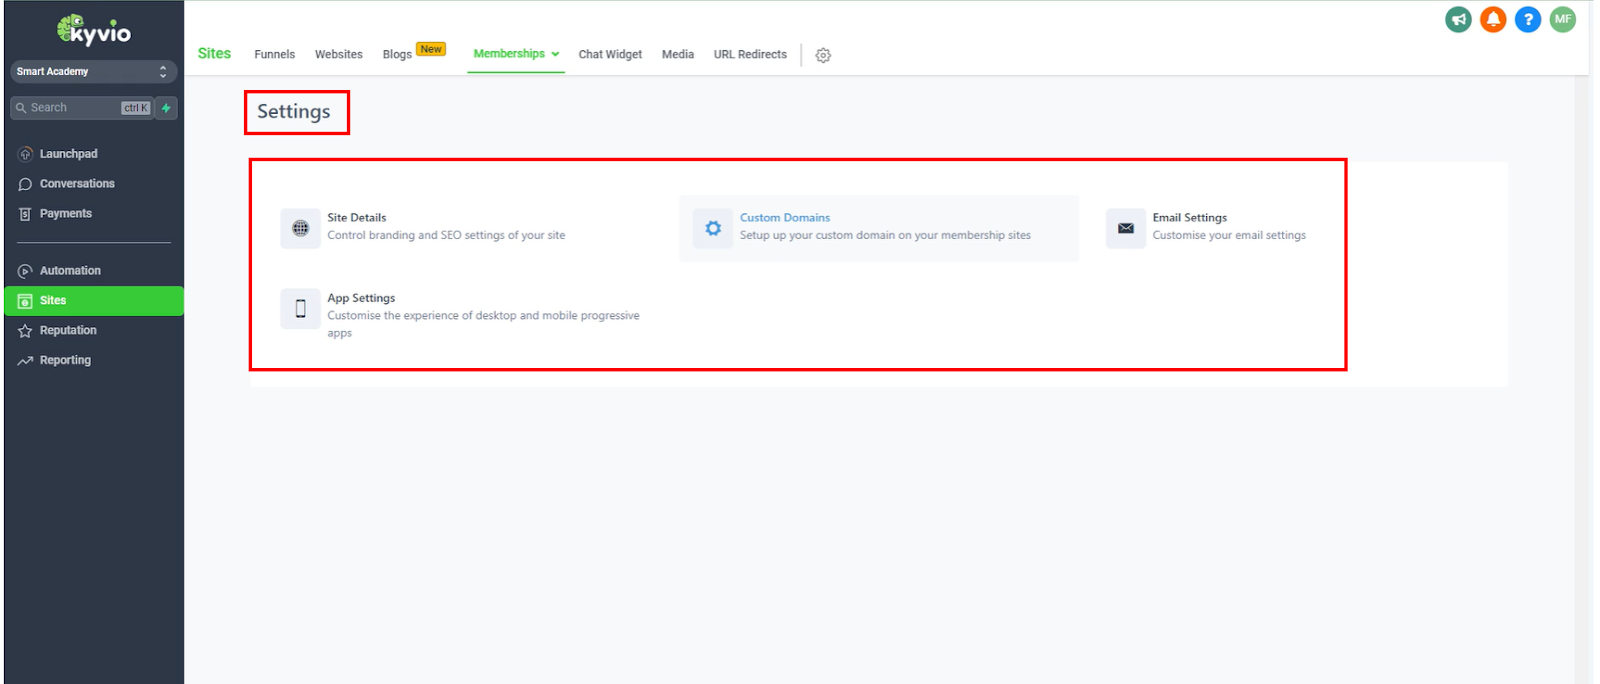
Membership inside Kyvio is an exciting feature that can help take your business to new heights! With Kyvio's membership system, you have the power to upload and share your valuable courses easily. You can effortlessly create and customize your membership, setting everything up just the way you want. Plus, you have the flexibility to craft enticing offers for your courses, ensuring that your audience gets the best value. So, go ahead and make the most of Kyvio memberships to enhance the quality of your course and provide your audience with an exceptional learning experience. Then, let's move forward and select the sites from the side navigation bar. After that, click on the membership dashboard. Now, go to the Products section, where you will have the opportunity to create your very own course
For example, if you want to create a new course, click on the key product option. Here, you will find a prebuilt skeleton templates to choose from. Once you select a template, you can easily upload your videos into it.
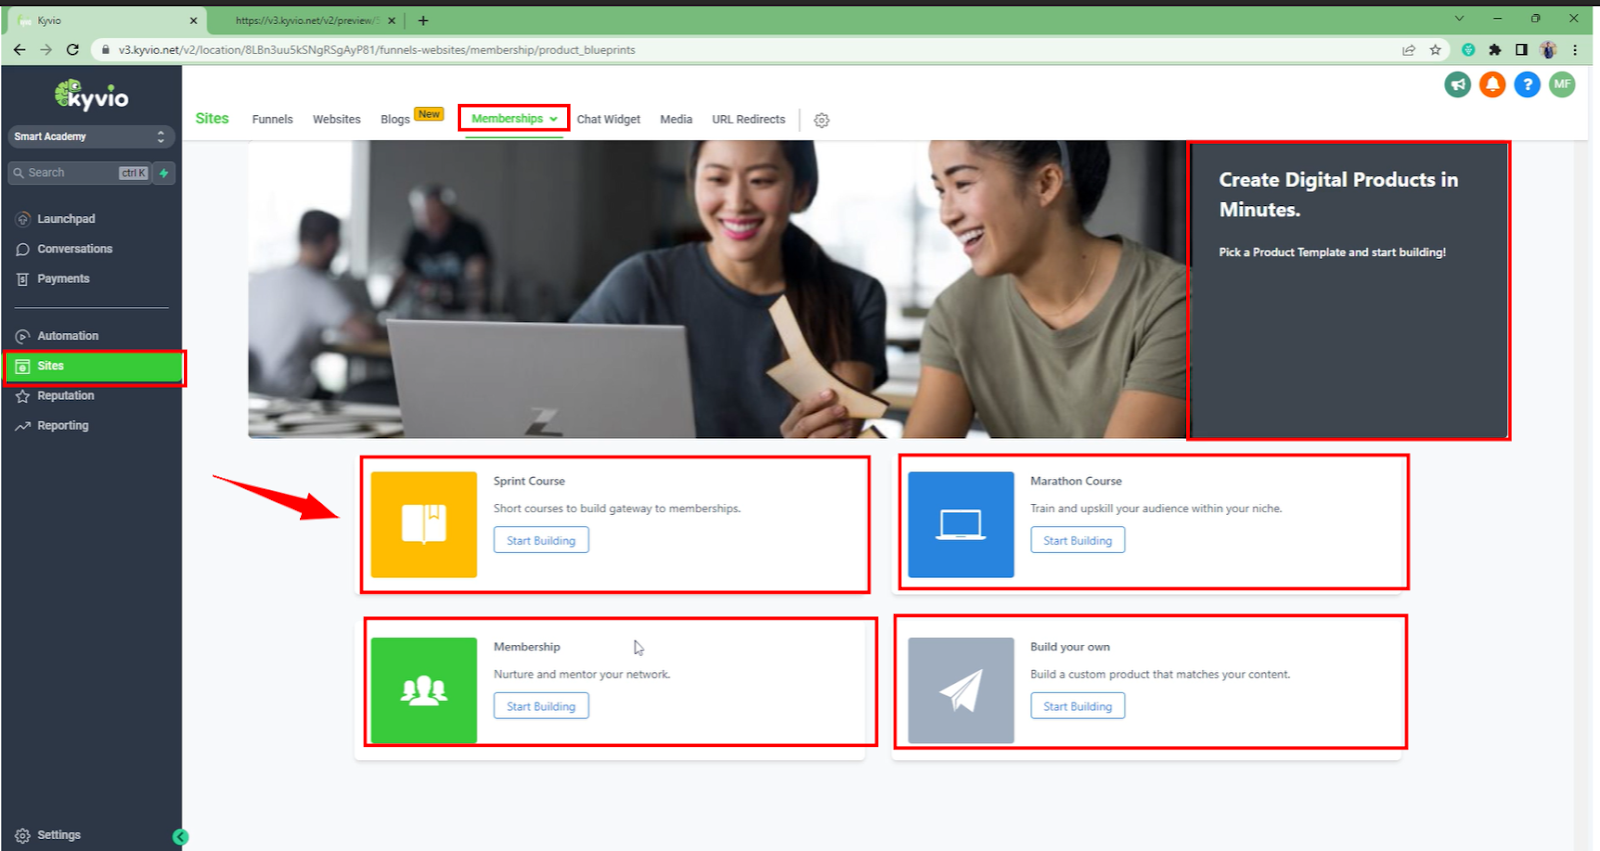
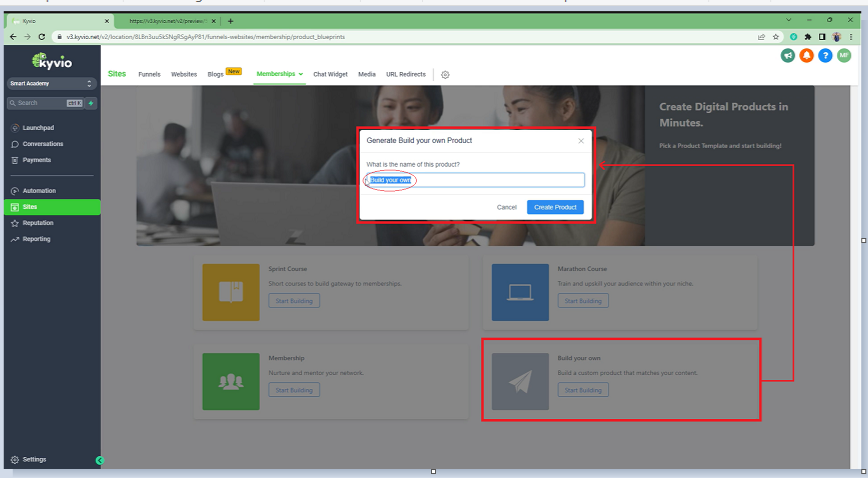
On the other hand, if you prefer to build your course from scratch, you can simply click on the "Start Building" button labeled "Build your own." From there, you can give your product a personalized name that aligns with your course, and then proceed to hit the "Create" button.
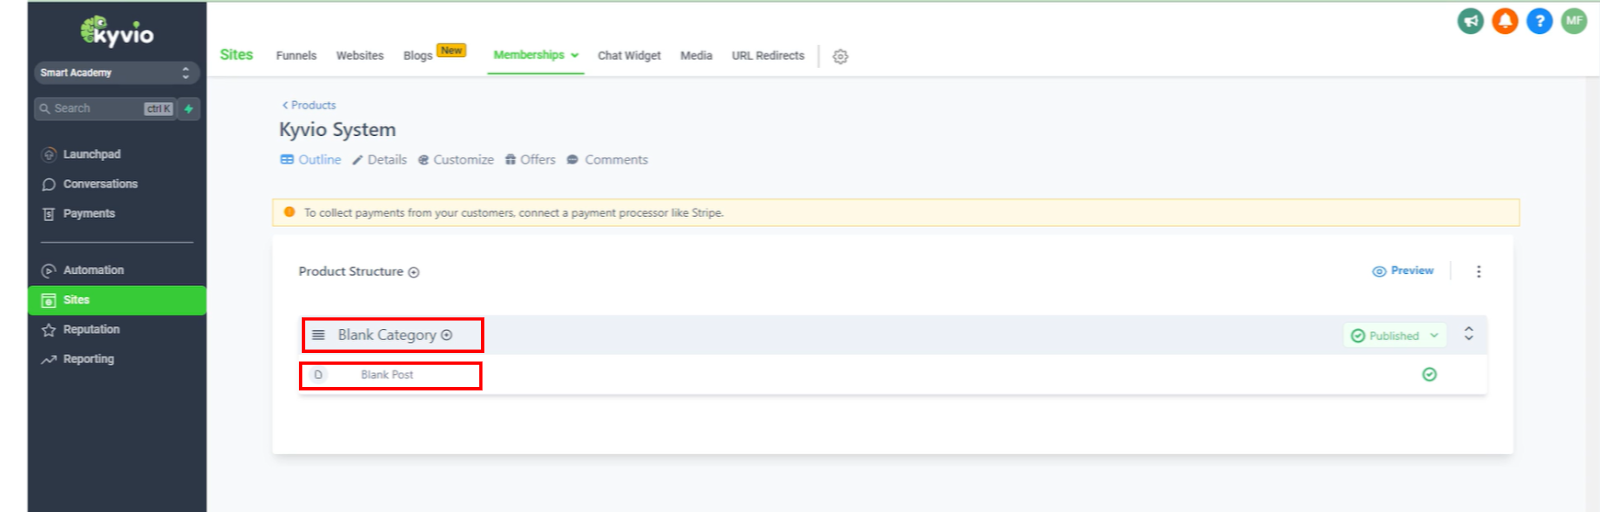
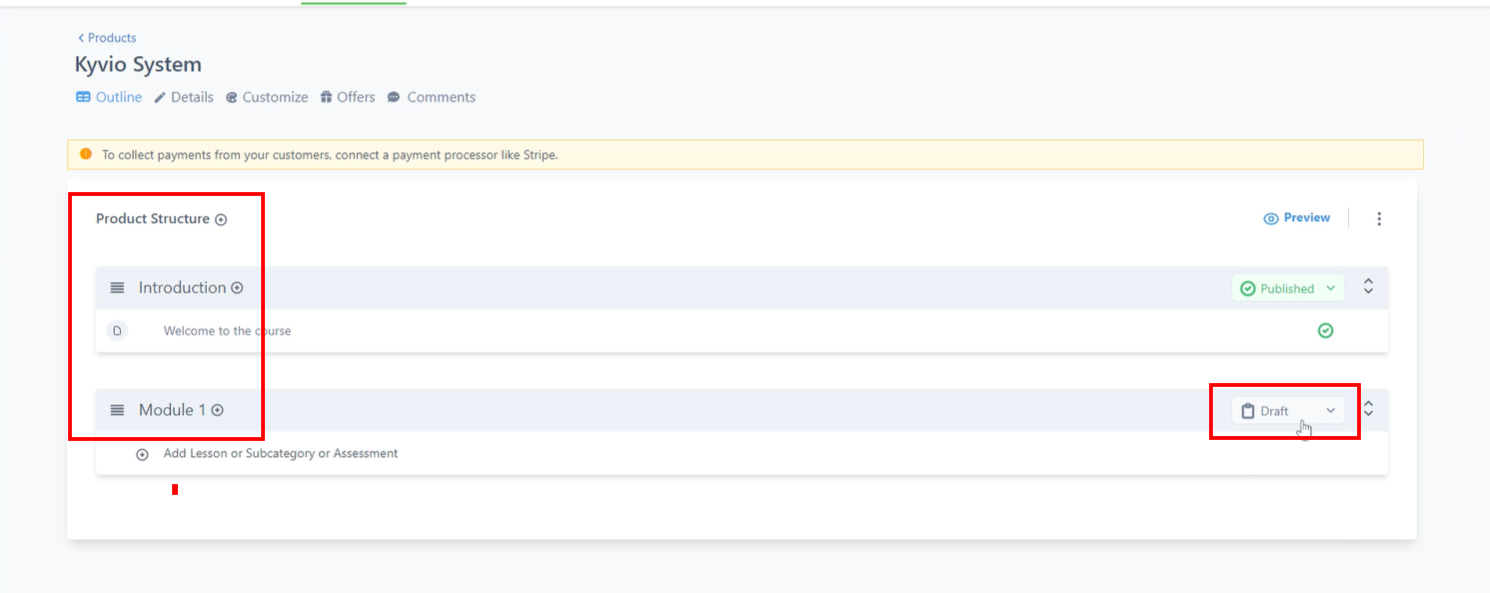
After successfully creating your course, you will be taken to the membership builder interface. Here, you have the freedom to create categories, subcategories, upload your lessons, and customize them to enhance their visual appeal. In the provided image, you can see the outline where you will establish your categories and add all the necessary lessons. With the product structure feature, you have the flexibility to organize and structure your course in a way that suits your needs.
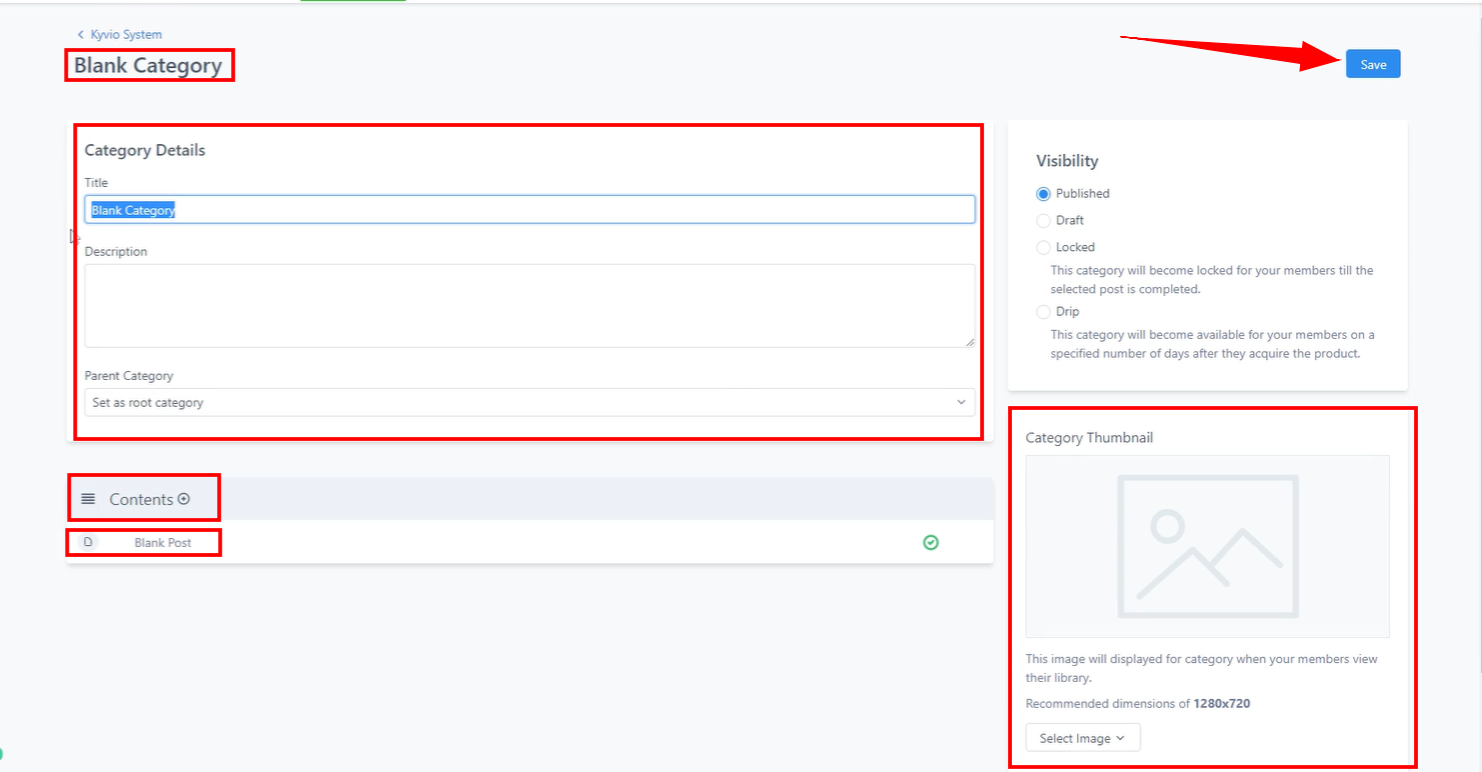
In the previous image, we can observe that there was one category and one lesson. To modify the category label and make it "Introduction," you can simply click on it and replace the existing text with "Introduction" in the provided blank space. Additionally, if you wish, you can enhance the visual appeal of the category by adding a thumbnail. Once you have made the desired changes, you can save your modifications by clicking the "Save" button.
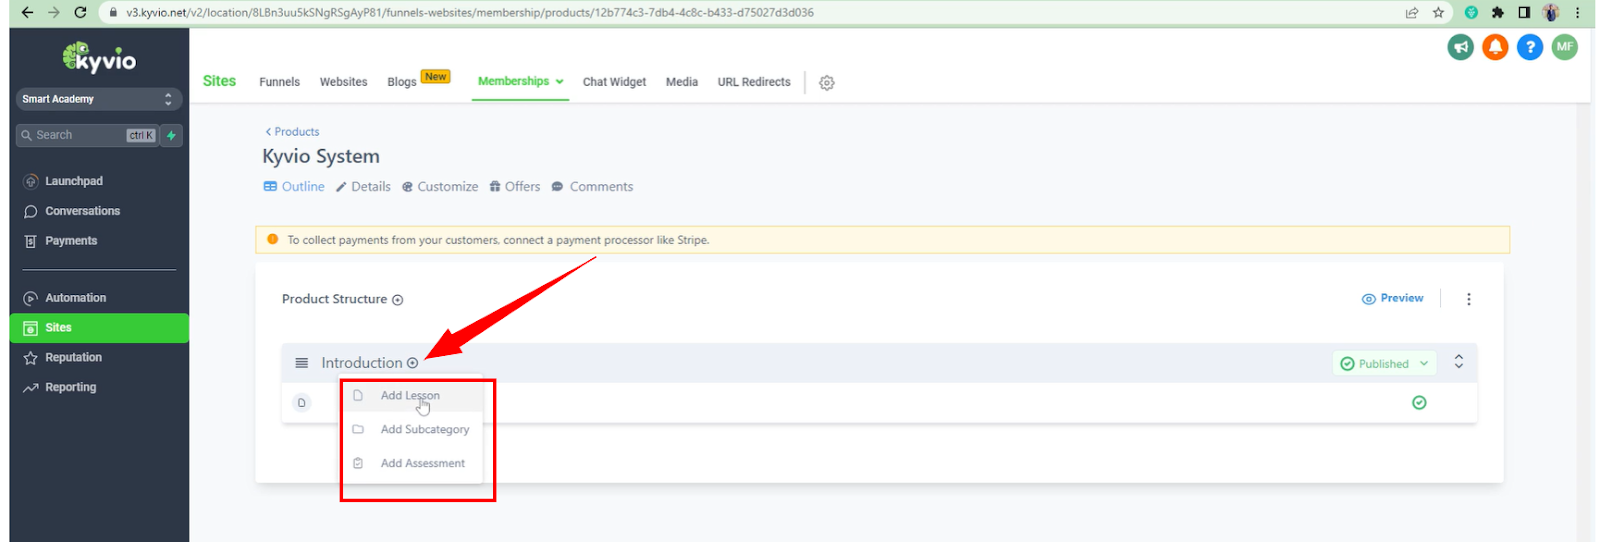
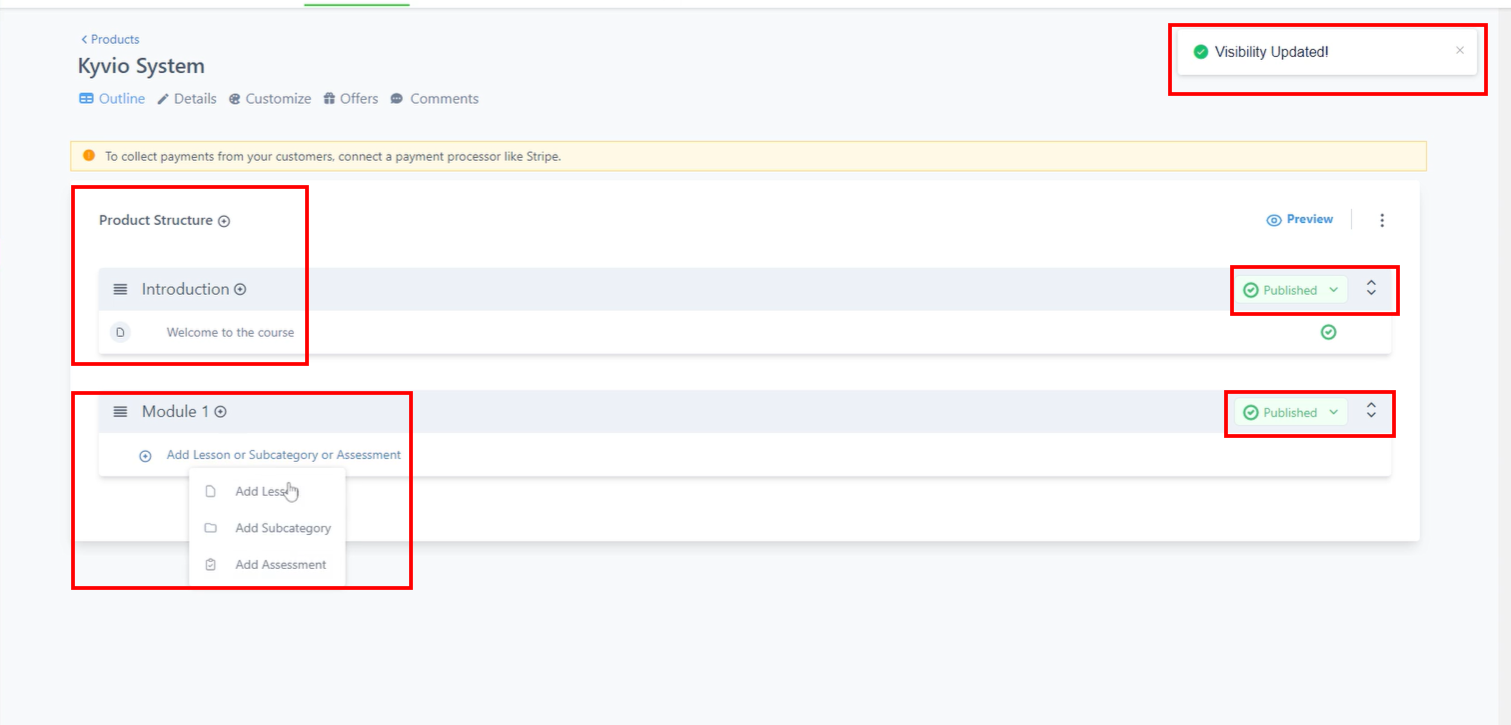
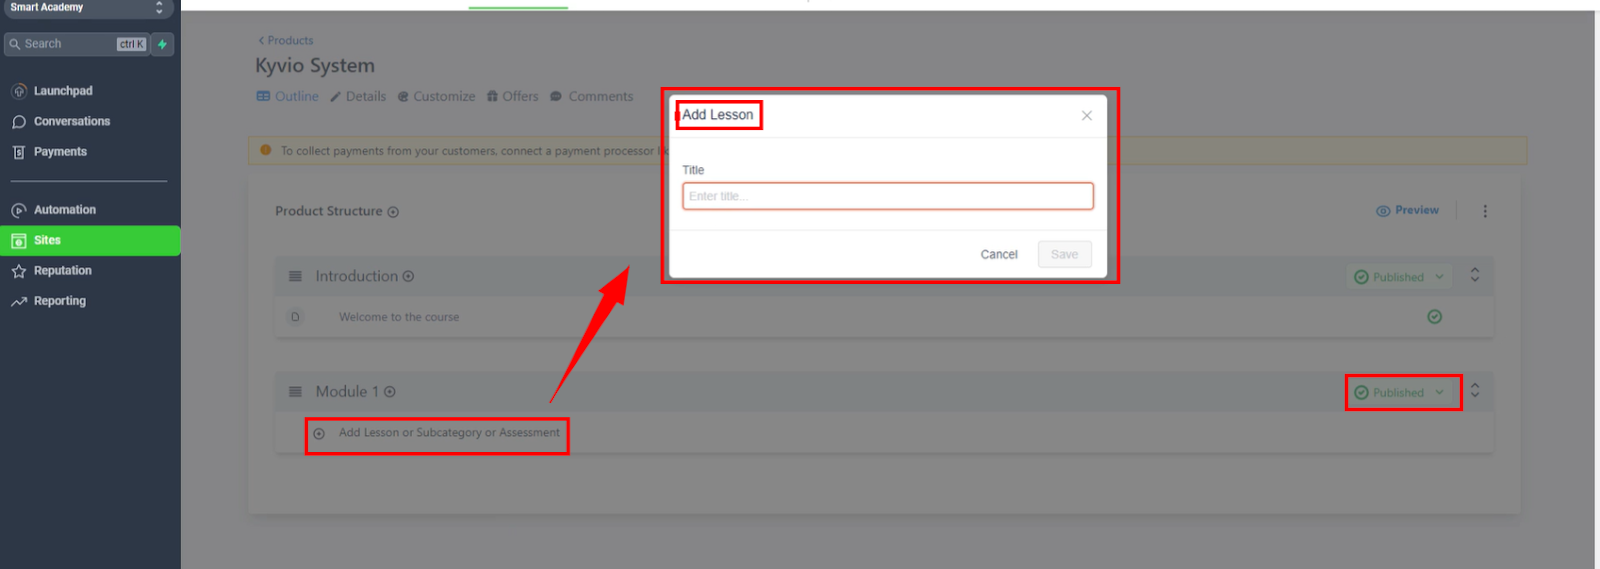
To create a new lesson, you need to locate the (+) symbol and click on it. A dropdown menu will appear, giving you various options to choose from: adding a lesson, adding a subcategory, or adding an assessment. Select the desired option based on what you want to add. Once you have made your selection, the new item will be displayed in the desired location. Users will be able to click on the newly added item to access its content.
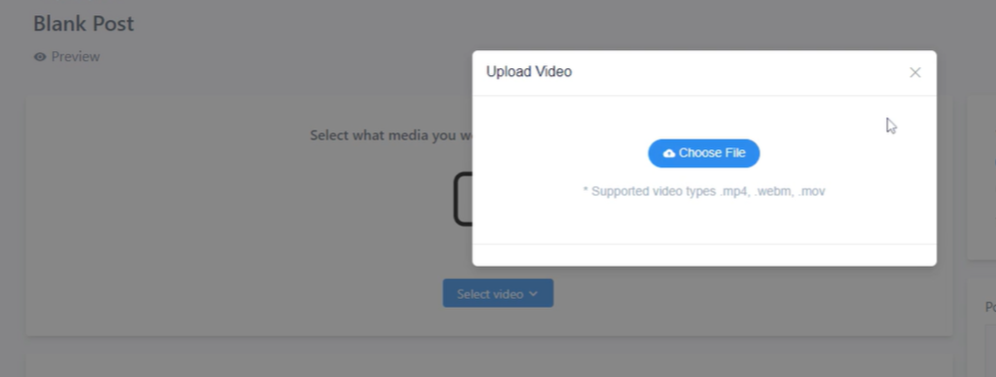
To upload a video, simply click on the highlighted red box in the image below. This action will directly take you to the Media library, where you can easily upload your desired videos.
We only support video formats such as MP4 and MLP, including webcam recordings. The maximum file size allowed for uploads is generally under 5GB. Therefore, you can conveniently upload files within this size limit as part of your memberships.
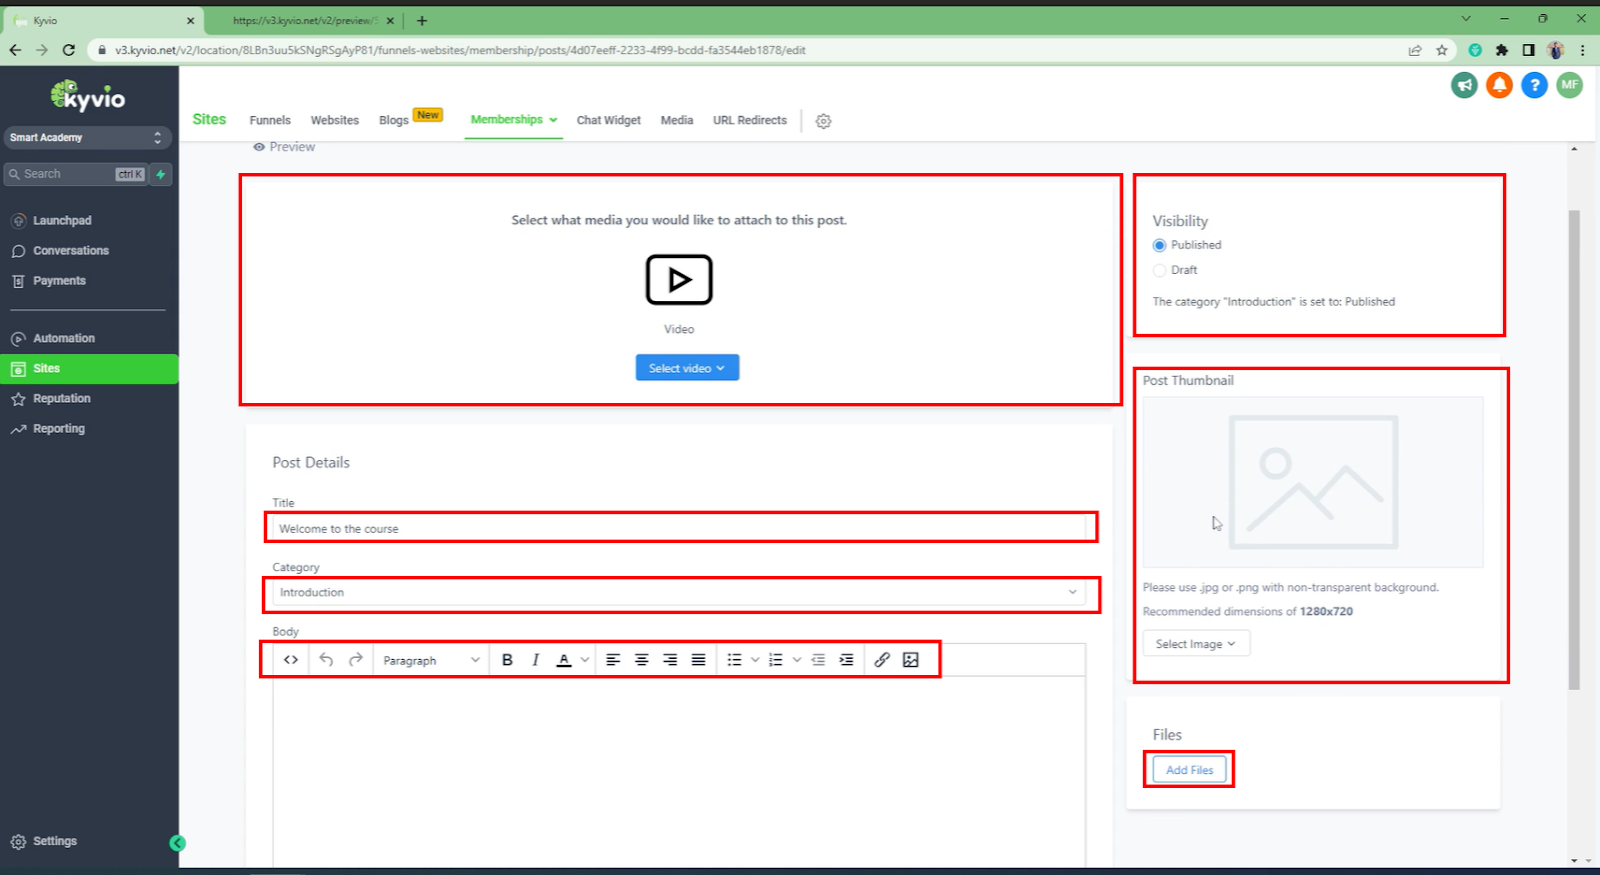
In the "Post Detail" you have the option to give a title to the video. For example, you can use the title "Welcome to the Course," as shown in the amended image. Additionally, you can write the description in the designated area. Furthermore, you have the ability to add files such as PDFs, documents, and Excel spreadsheets. Additionally, you can include a thumbnail or poster image for the video. Finally, you can click on the "publish" button to make the post visible to others and then hit "save" to retain the changes made.
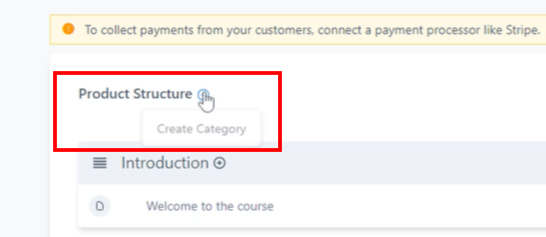
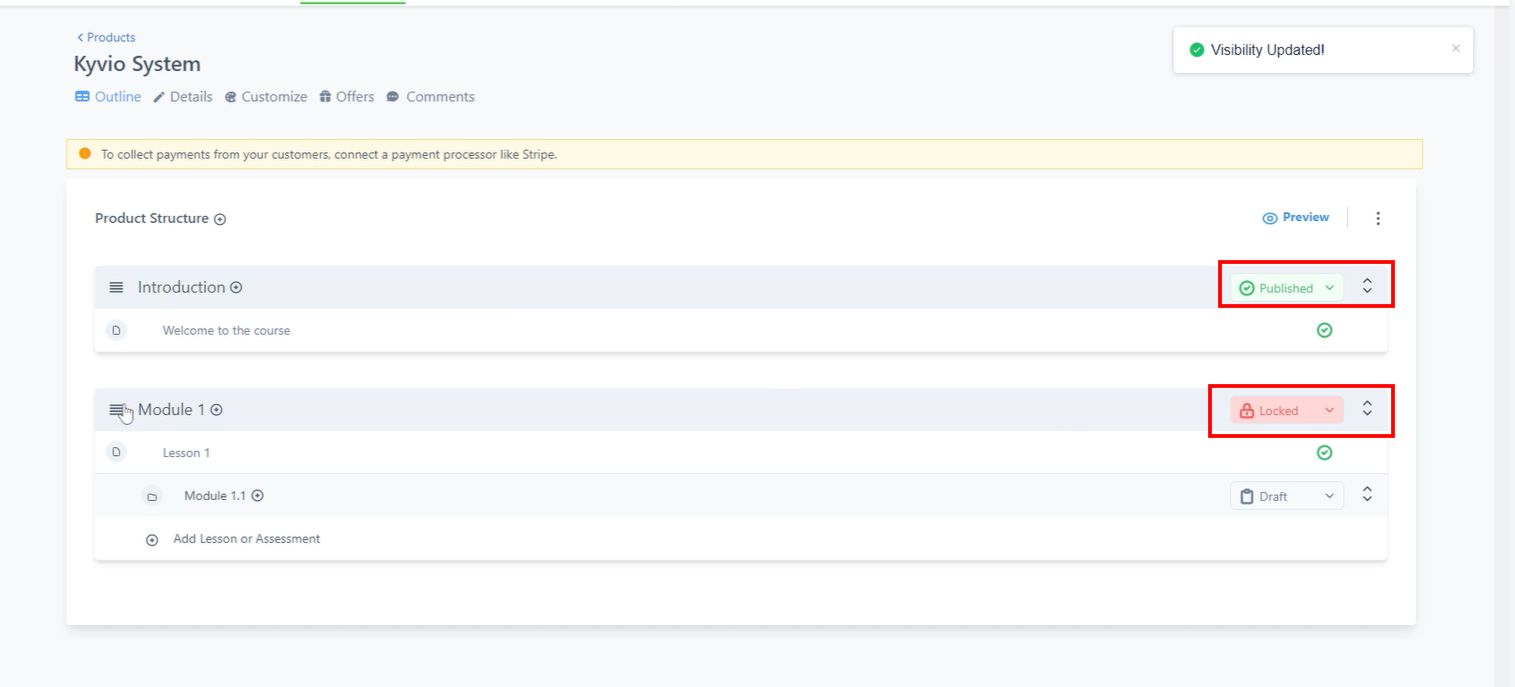
After completing the previous steps, you can navigate back to the main page and check the current status. In this case, since it is the first lesson, it will be displayed accordingly. Now, if you wish to create a module 1, you can simply click on the "module" option provided. This action allows you to create a category for the module.
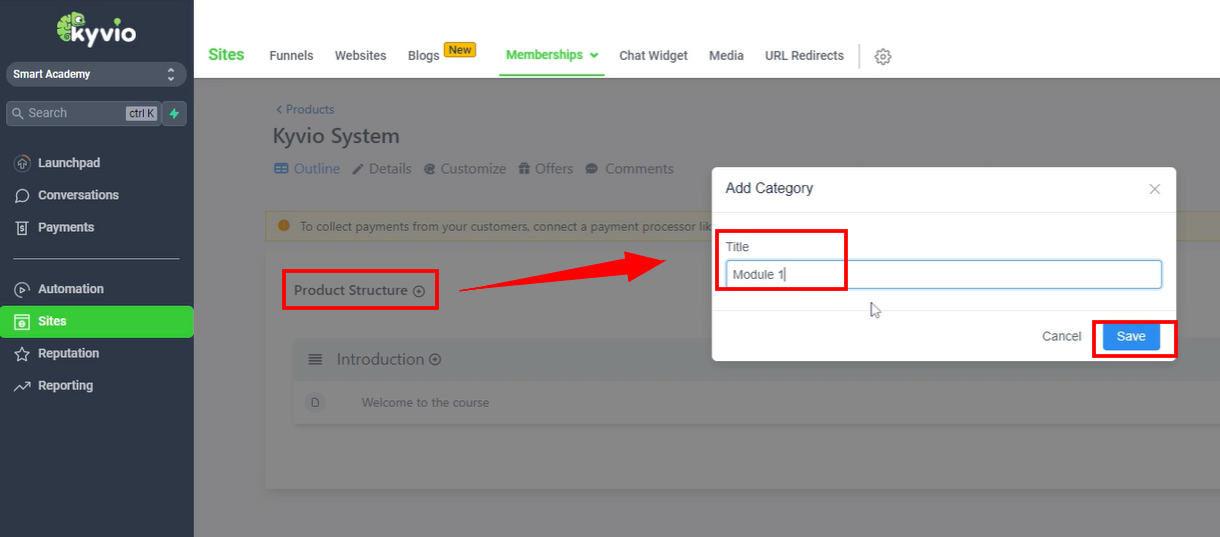
To continue, let's create a new category. Currently, it is in draft mode, but if you want to make it published, you can simply change its status to "published." Once that is done, you can proceed to add a lesson. Click on the appropriate option and create "lesson one." In this section, you can perform the same actions as before: upload your lessons, click on "published" to make them available, and remember to save your changes before going back. After completing these steps, you can create as many lessons as you desire. If you wish to create a subcategory, such as "module 1.1," you can do so and then save your changes.
Once you have created the course category, you have the freedom to populate the "upcoming" section with as many lessons as you desire. This gives you the flexibility to create a comprehensive and engaging learning experience. By structuring your course in this way, you can effectively organize and present the material, ultimately enhancing the quality of the learning journey.
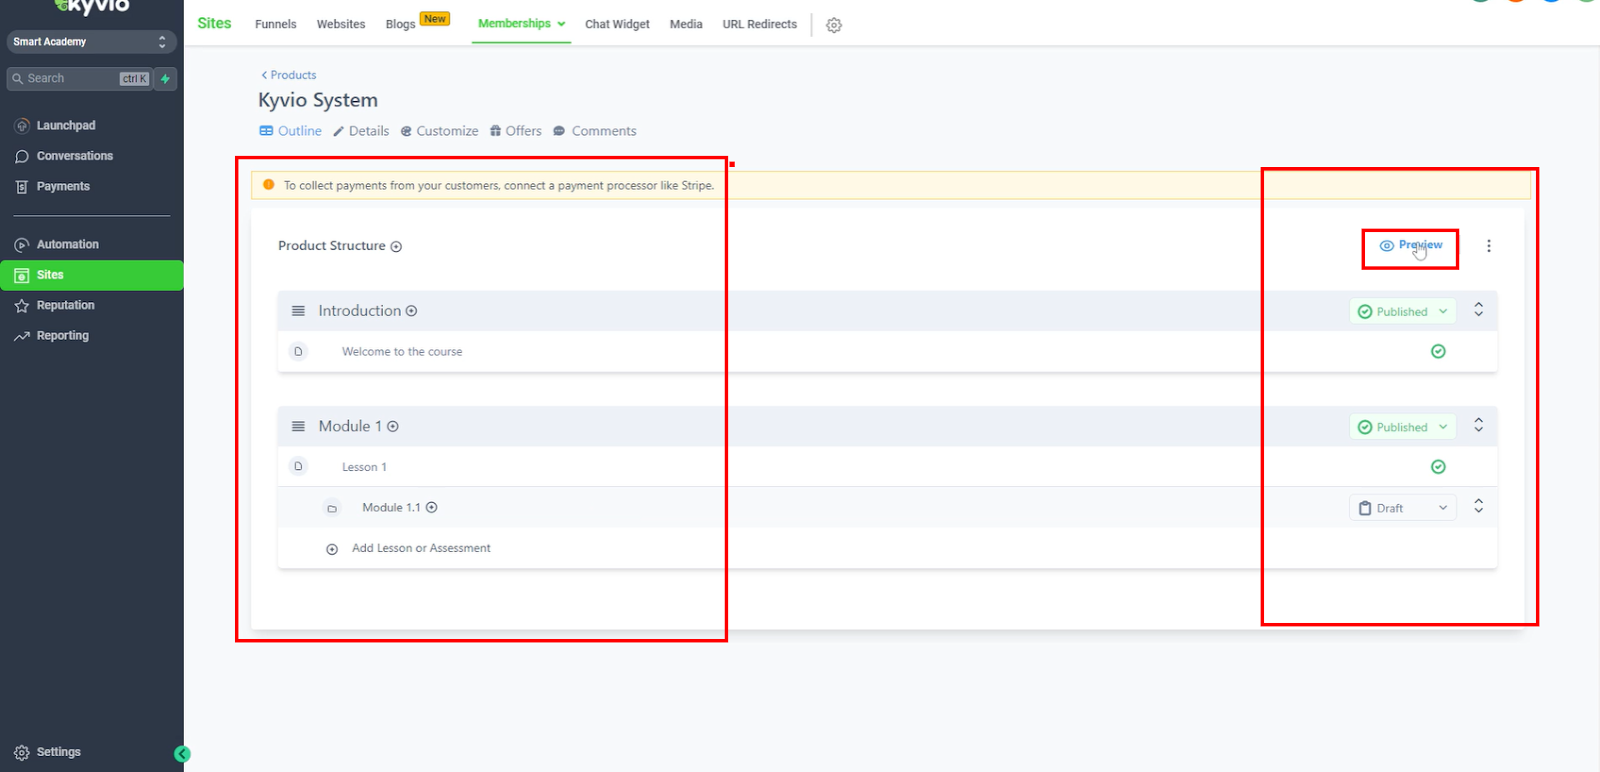
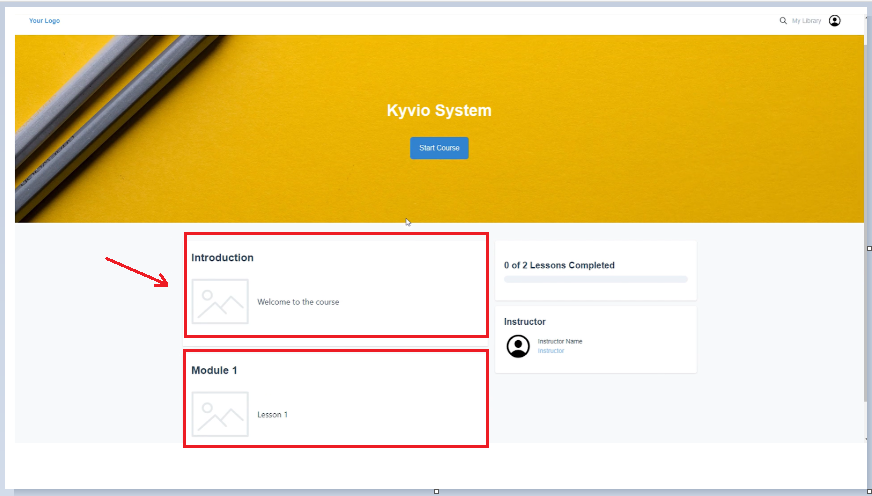
After you have finished creating your course and adding lessons, you can easily preview how it will appear to your students by clicking on the "preview" button. This allows you to visualize how your course will look and make any necessary improvements. This feature helps you ensure the overall quality of the course. You can identify and rectify any areas that may require refinement, resulting in an improved learning experience.
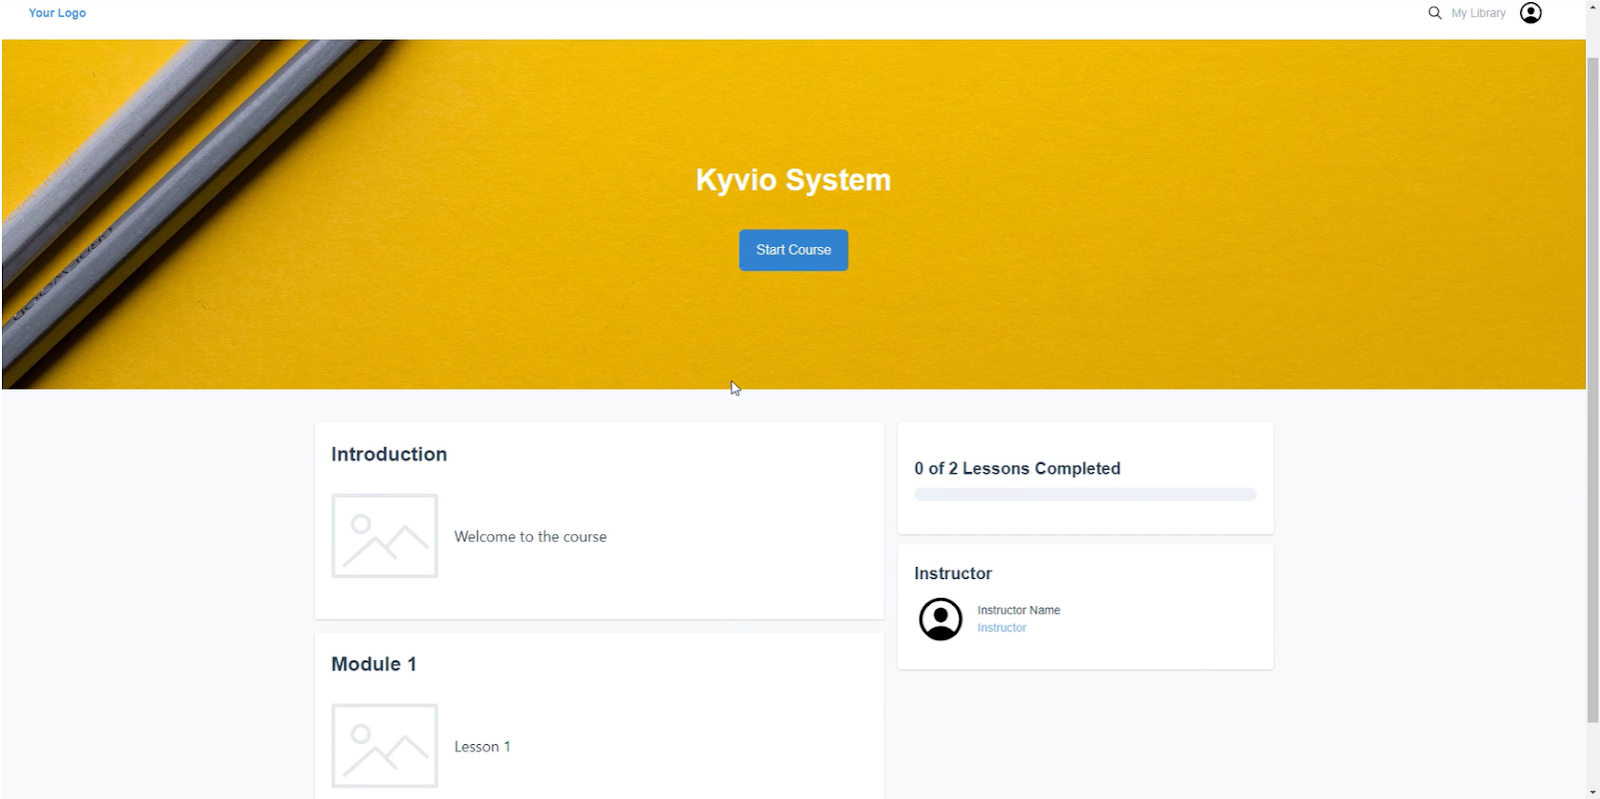
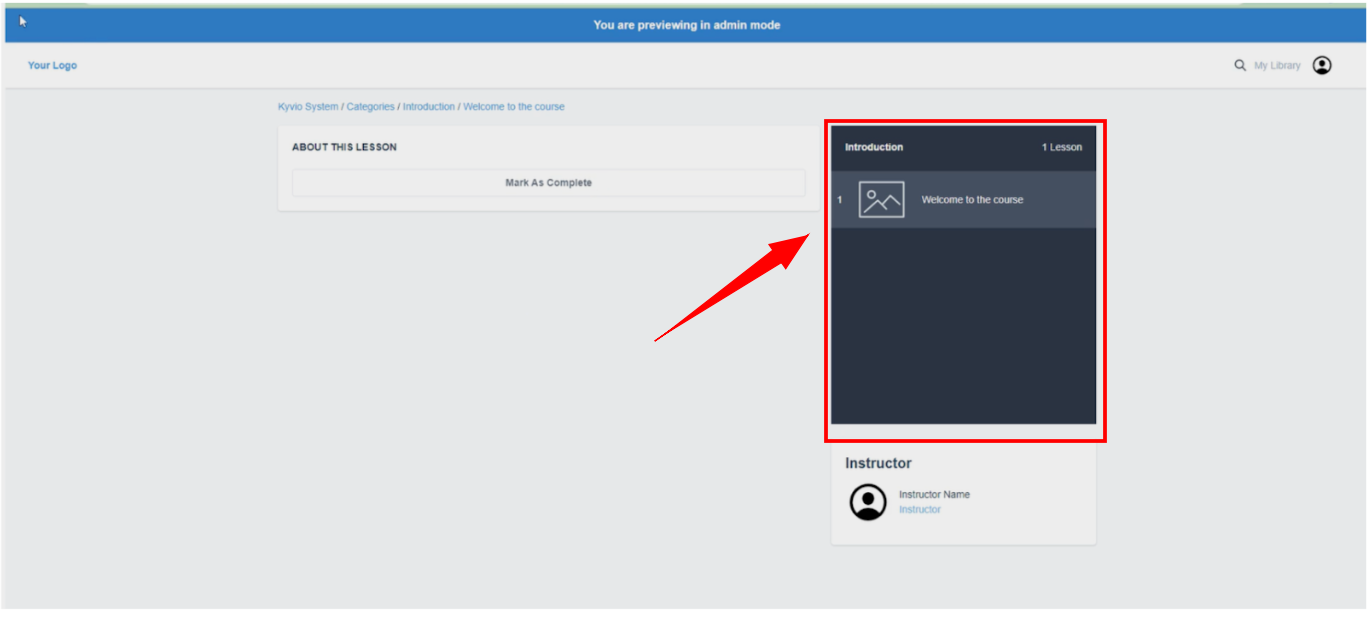
If you click on the "Introduction" or navigate to this category, you will find only one video. Similarly, by clicking on "Module One," you will see a similar layout with only one video available. This structure remains consistent throughout the course.
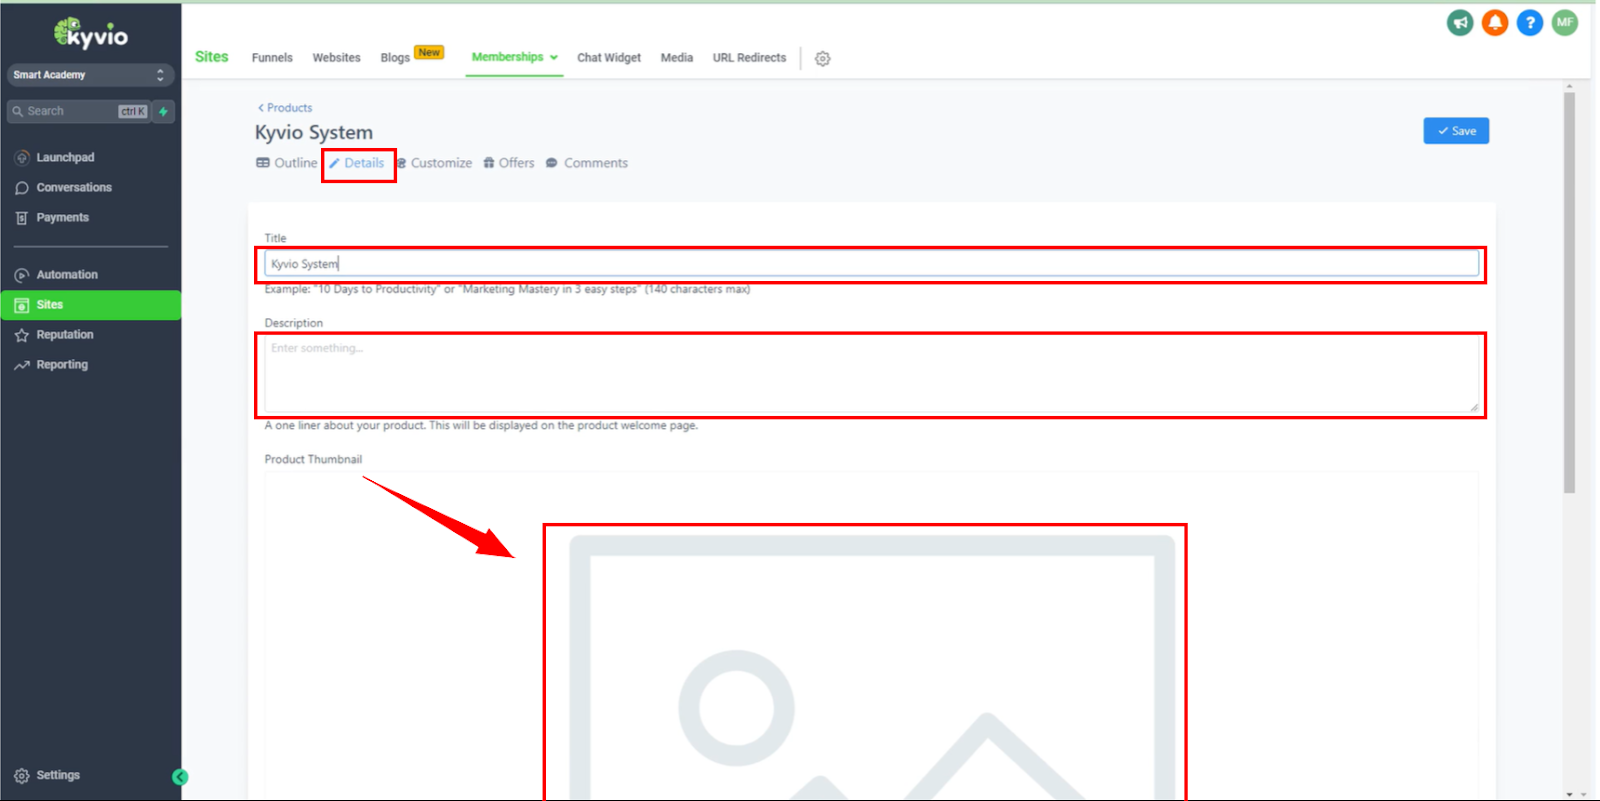
To begin, you can go back to the details section by filling all highlighted fields like provide a name for your course. Then, write a description that captures the essence of the course. To add an image, you can select and upload one from your computer. After completing these steps, you can customize the course further.
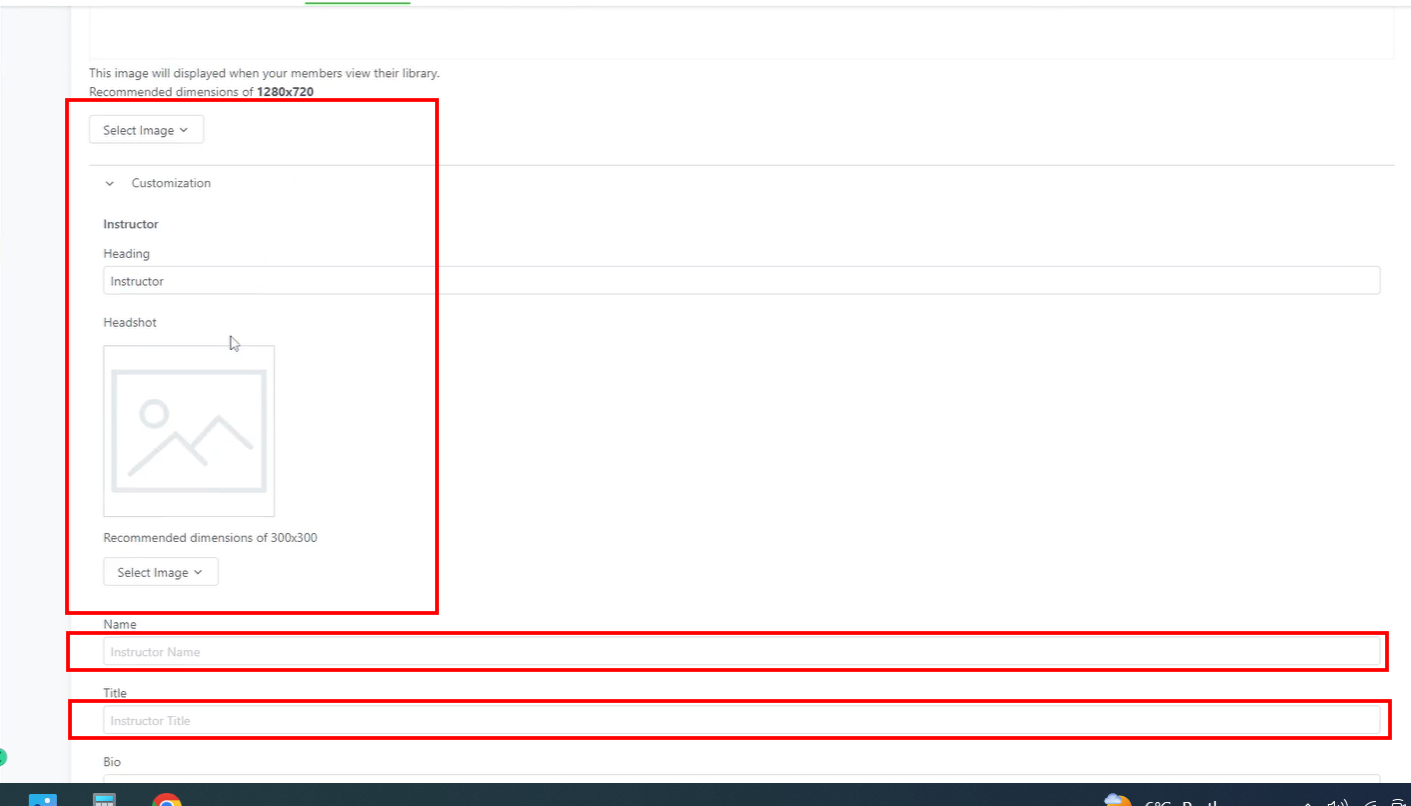
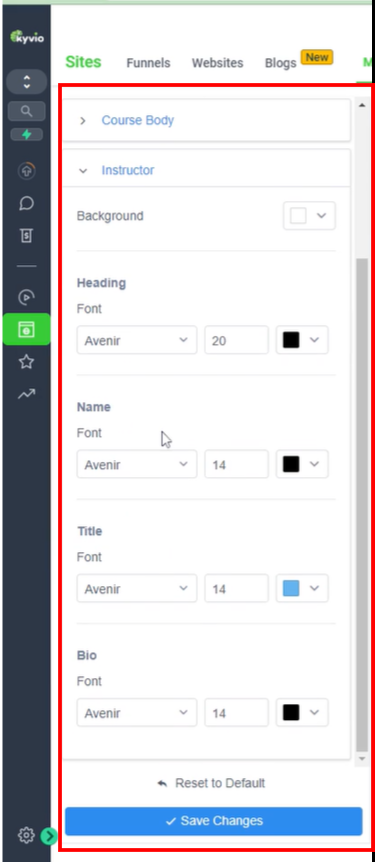
In the customization section, you have the option to upload a picture and a headshot. You can choose a name for your instructor. You can also include their bio if desired.
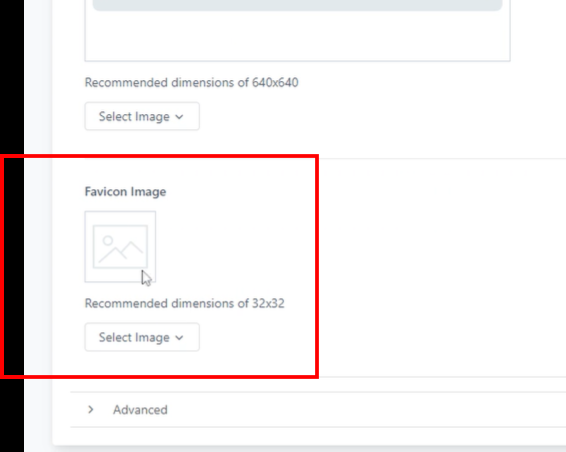
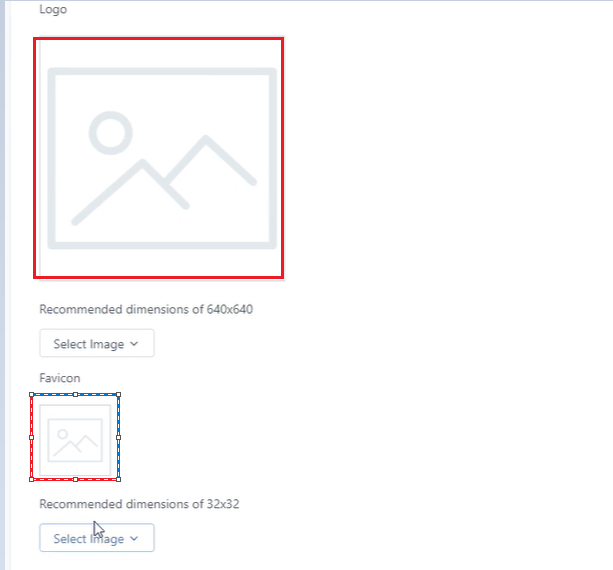
Additionally, if you have a logo or favicon, you can upload them here. If you are an expert in customer JavaScript or CS, you can highlight those skills. There is also the option to include any specific head record or protocols you follow. Once you have made these customizations, you can save your changes and proceed to the next step.
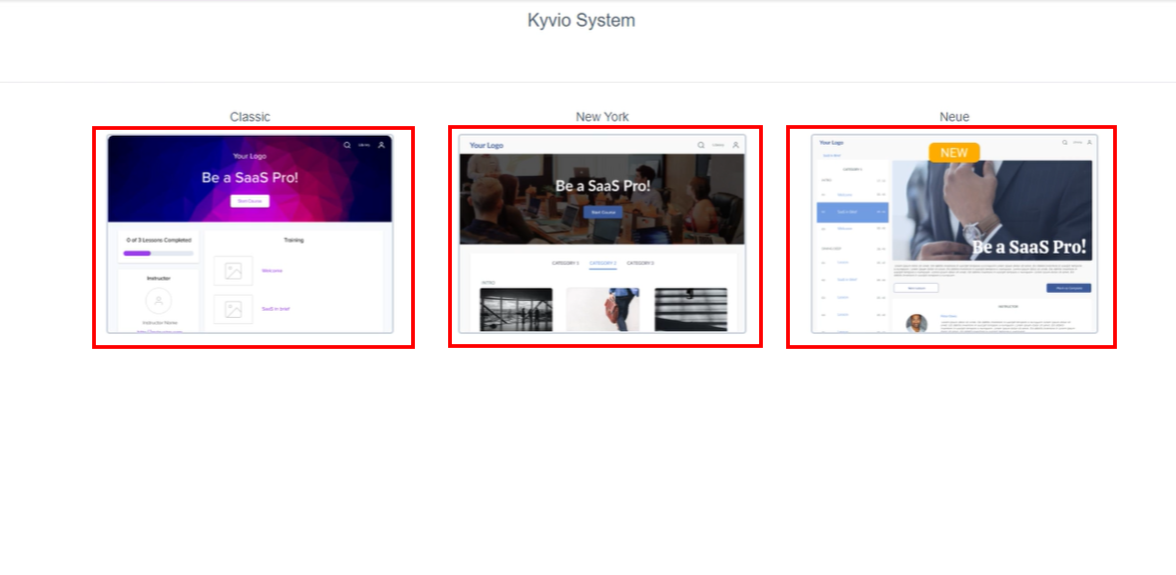
There are three distinct templates available: classic, New York, and "Neue." If you would like, a preview of each template offers to visually demonstrate their unique appearances. It is worth noting that these templates exhibit noticeable differences from one another, ensuring a diverse range of options for you to choose from.
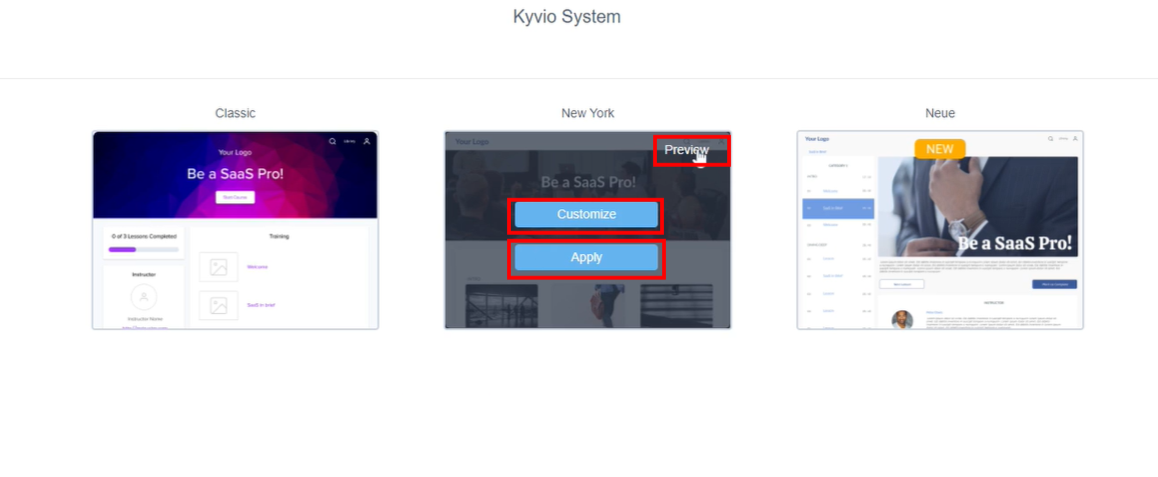
You have the option to select any of these themes without making any modifications. Simply preview the theme of your choice and click "Apply" to save it. On the other hand, if you prefer to customize the theme, you can click on the "Customize" option, which will take you to the customizable layout where you can make changes according to your preference.
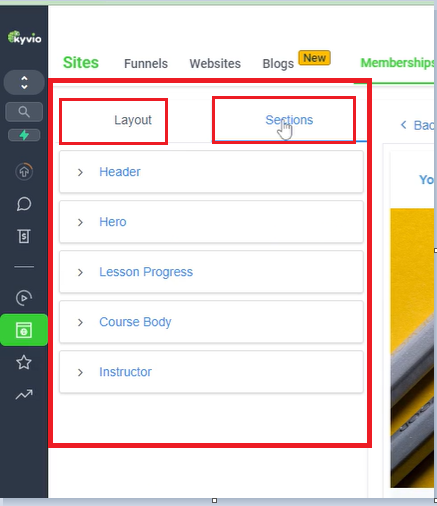
You have the option to customize the theme by making changes to the layout and sections according to your preferences. By clicking on the "Layout" option, you will be able to access various sections, such as the header. In the header section, you can upload a background picture or remove the existing one. Additionally, you can make changes to sections like lesson progress, course body, and instructor by adjusting their sizes and styles to your liking. After making the desired changes, don't forget to hit the "Save" button to save the customized theme. Once saved, you can apply the theme and enjoy the updated look.
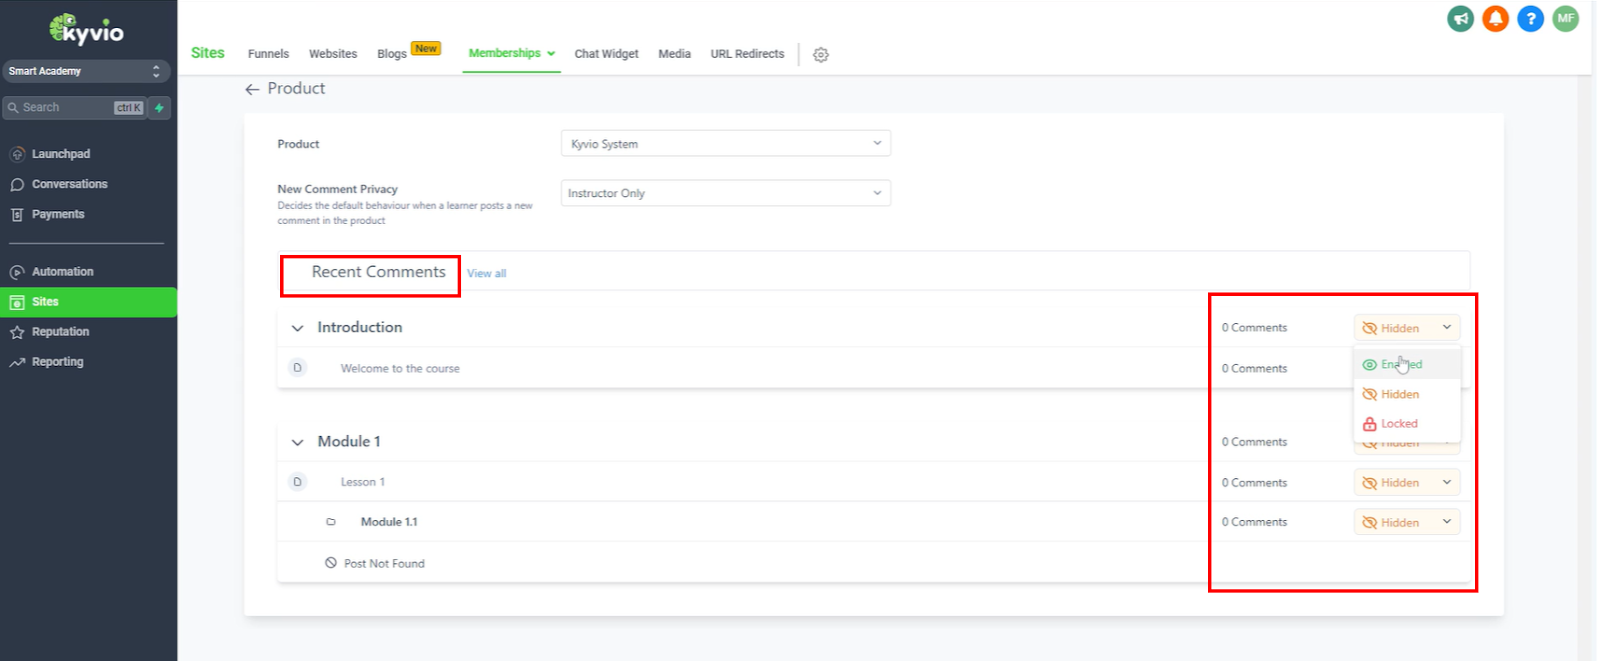
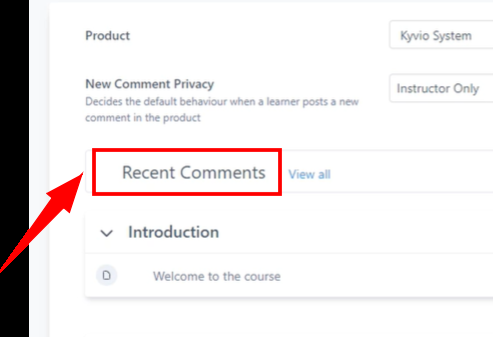
Within the "comments" section, you have the choice to enable or disable the feature based on your preference. Enabling comments allows for open communication where everybody can engage by posting their thoughts and opinions on your videos.
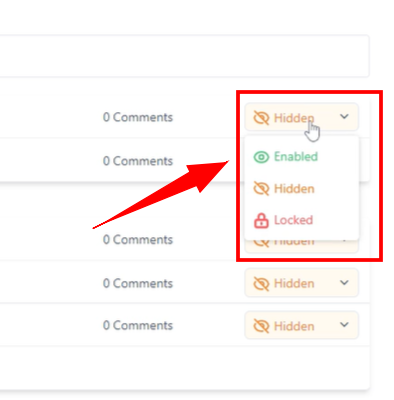
In the next category, which can be set as "locked." This means that the category remains inaccessible to users until they have completed the necessary steps, such as engaging in discussions or marking previous lessons as complete. Once the user meets the requirements, they gain access to the locked category and its associated lessons. It's important to note that for this membership product setup to work effectively, ensure that all your videos are published. By making them public, you guarantee that they are visible to the intended audience. This ensures a seamless user experience and allows your members to access the content they have subscribed to.
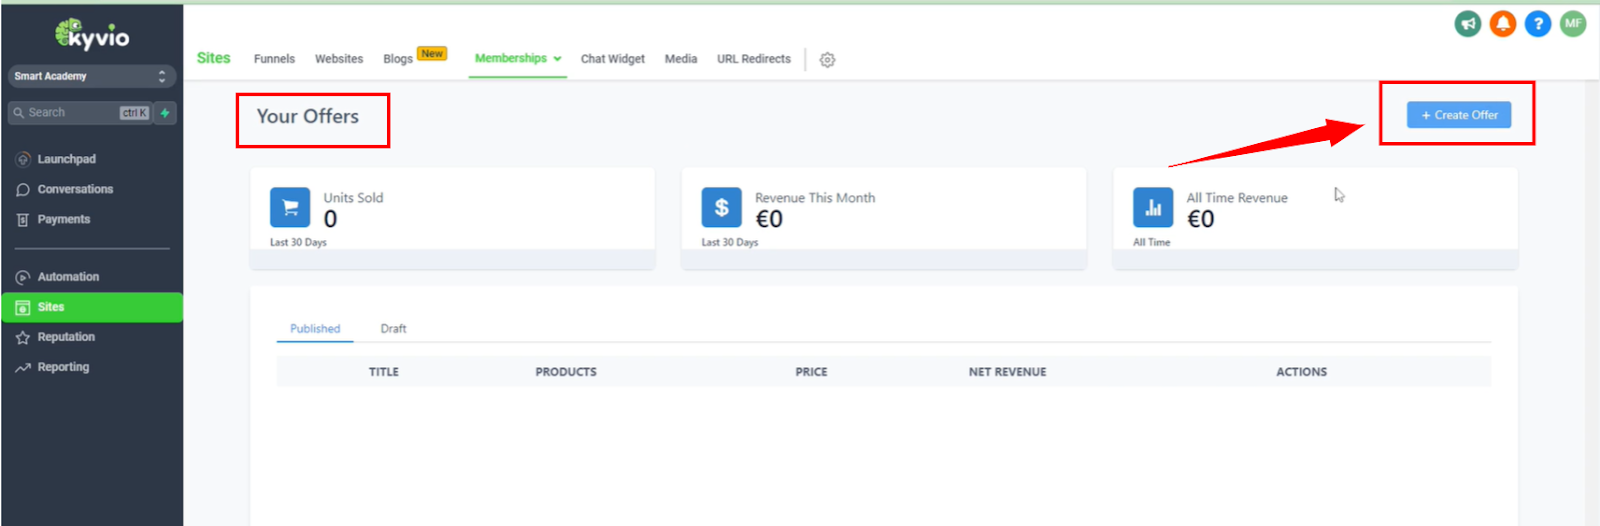
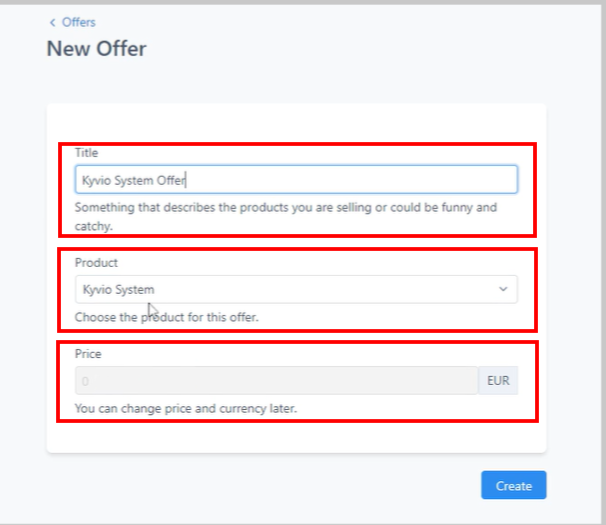
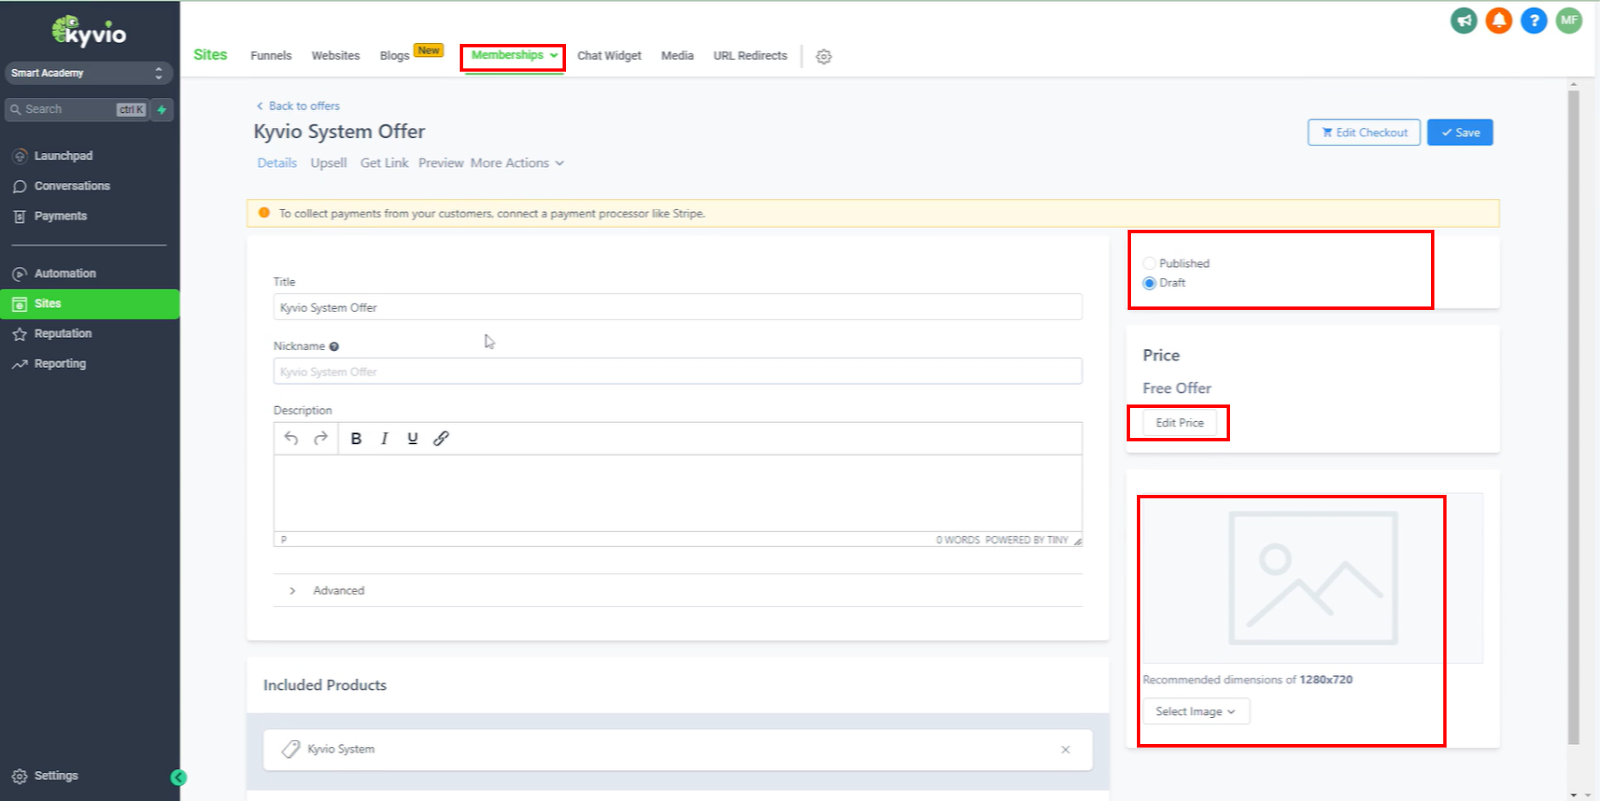
Once your course is created, you can effortlessly proceed to the 'Offers' section and craft an enticing offer for your specific product. To do so, simply enter a captivating and distinctive offer name like "Kyvio System Offer" into the Title box. Then, provide the product details and specify the price in the dedicated column. Finally, click the "create" button to finalize your offer.
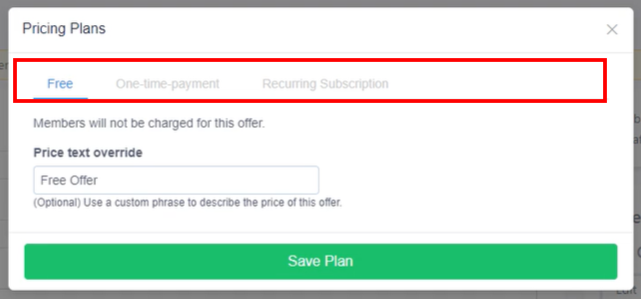
After that, you need to ensure that it is published and your Stripe account is connected. Once your Stripe or any other payment gateway is connected, you can easily edit the price. This allows you to offer both one-time payments and subscription options. Simply create the desired payment plans, save them, and indicate if it's a one-time payment. That's how you can set it up. Adding your logo is optional; otherwise, this is how the product creation process works.
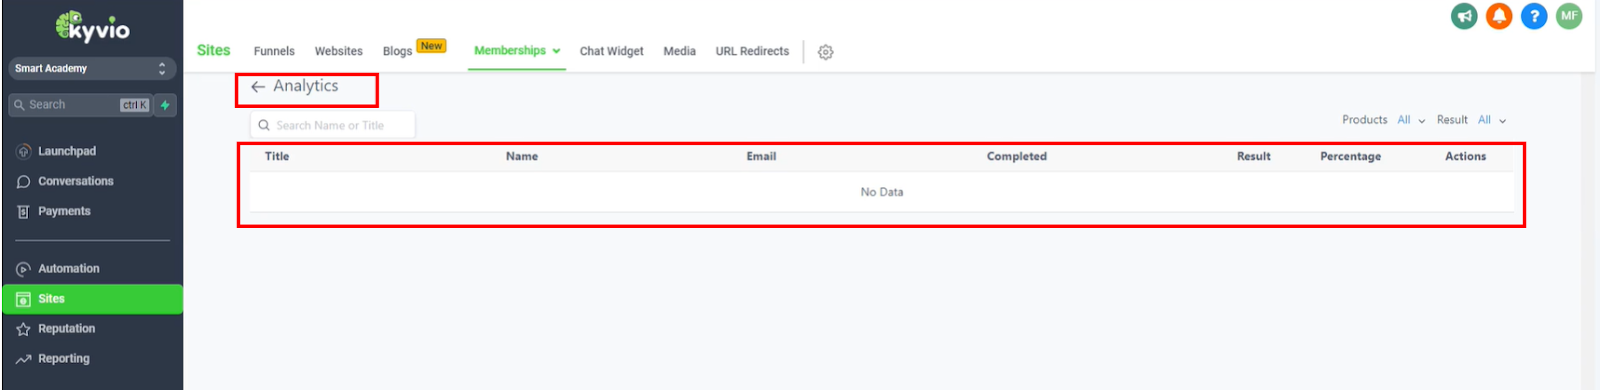
Once you have created an offer, you can access the analytics section. Here, you can track various aspects of your course. For instance, you can monitor the number of users enrolled, the completion status of lessons, their last login information, and the frequency of logins. Additionally, you can view the start date of each user's course journey. All this information is accessible within the analytics section.
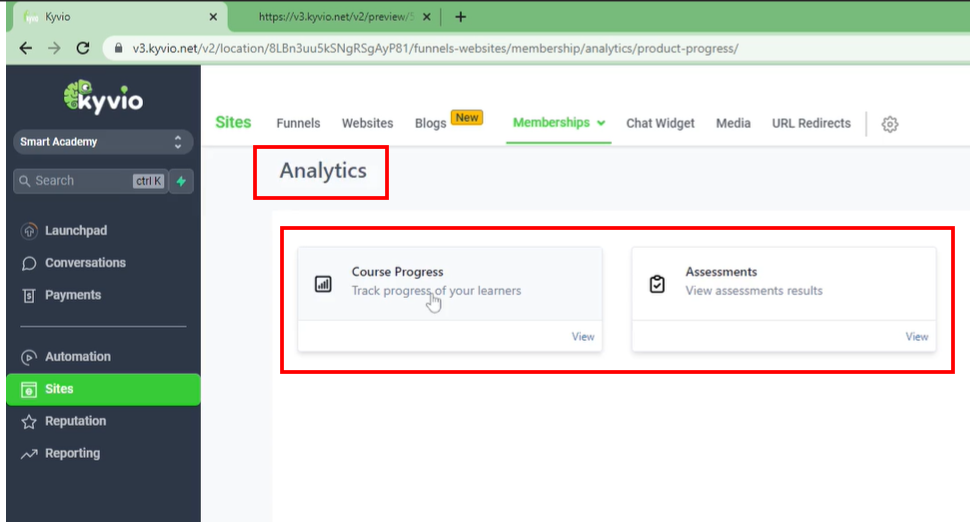
Furthermore, in the assessments section, you can find details such as the names and emails of individuals who have completed assessments, along with their results and corresponding percentages. Each user's assessment history is available for review.
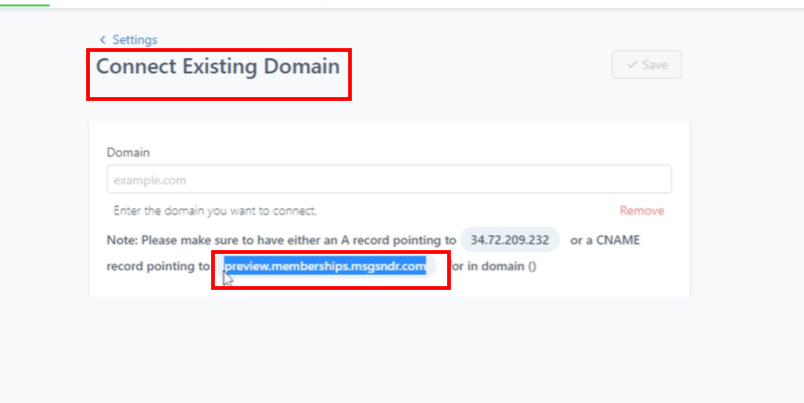
To configure specific settings, navigate to the settings section. Here, you can assign a custom domain to your product. Copy the given C name and add it to your domain hosting provider. For example, if your domain is "domain.com" and you create a C name with the name "members," your custom domain would be "members.domain.com". Save the settings after making the necessary modifications. This is the process for setting up a custom domain.

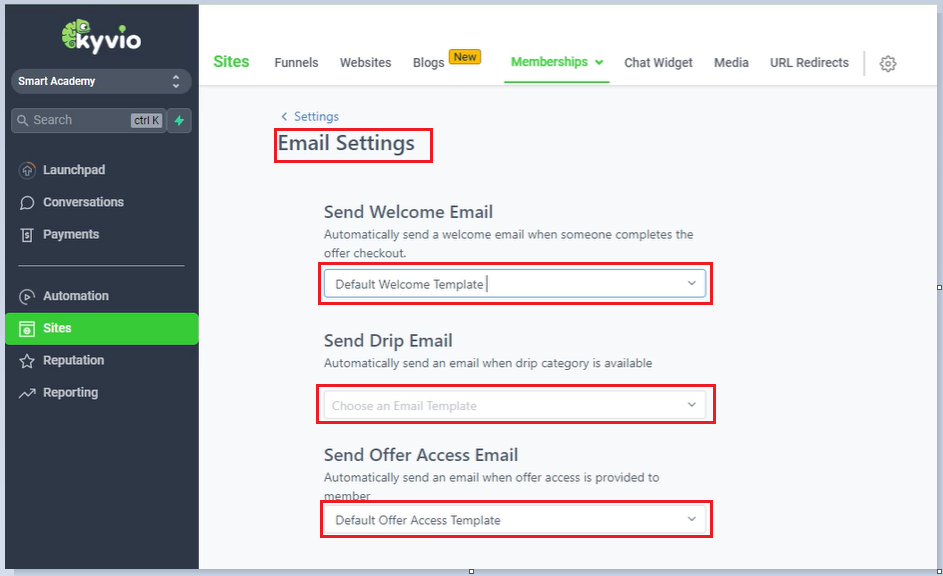
Once connected, you can easily navigate back to the login page of your course. Here, in the email settings, you currently have a default template in place. This template is automatically triggered when someone signs up, seamlessly directing them to the next step. They will receive an email containing their login details, password, and the URL for accessing the course. With a simple click, they can swiftly sign in to proceed with the course.
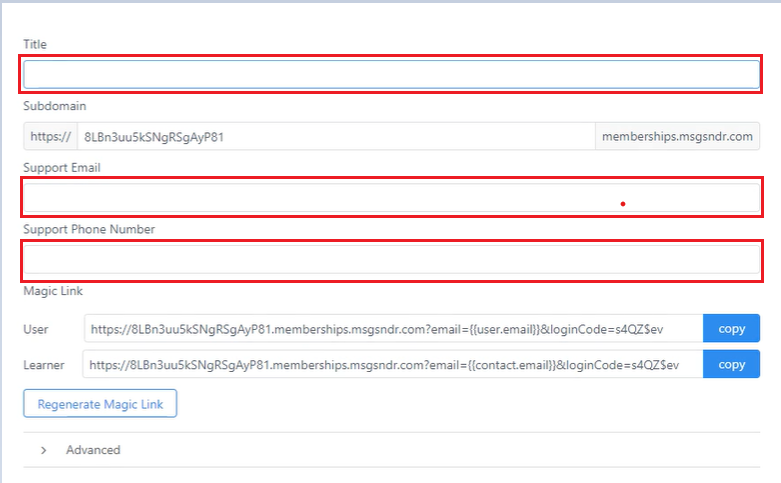
In the next section, you have the option to customize important SEO details to enhance your online presence. You can provide a compelling title that accurately represents your course. Additionally, you can personalize your subdomain to align with your brand or course name, establishing a unique online identity.
To facilitate seamless communication with your users, you can designate a dedicated support email address and a reliable phone number, creating multiple channels for assistance. Incorporating your brand logo and favicon further strengthens your brand recognition Furthermore, while the mobile app is not currently accessible to users, rest assured that it will soon be launched, offering an even more convenient and engaging learning experience.
In conclusion, the Kyvio system offers a comprehensive range of membership options that cater to your specific needs. Within the dashboard, you'll find a variety of choices for member check-out sales, allowing you to customize and optimize your sales funnel. These options empower you to seamlessly manage and grow your membership base, providing a streamlined and efficient experience for both you and your members.